WordPress
To install the Cookie Consent Manager from Papoo Software & Media GmbH on your WordPress-blog or your WordPress-website, simply follow these steps:
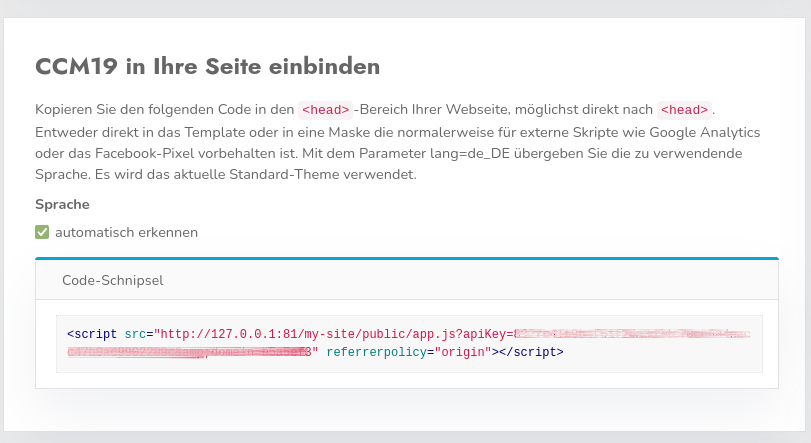
Access the Dashboard in CCM19
Log in to your CCM19 tool and look for the "Integrate CCM19 into Your Site" section on the dashboard. There you’ll find the-code snippet for your CCM19 installation.
Log in to WordPress
For the easiest way to integrate the Cookie Consent Manager into a WordPress-website, you should use our plugin. The plugin automatically places the code snippet-in the correct location. Log in to your WordPress-site as you normally would.
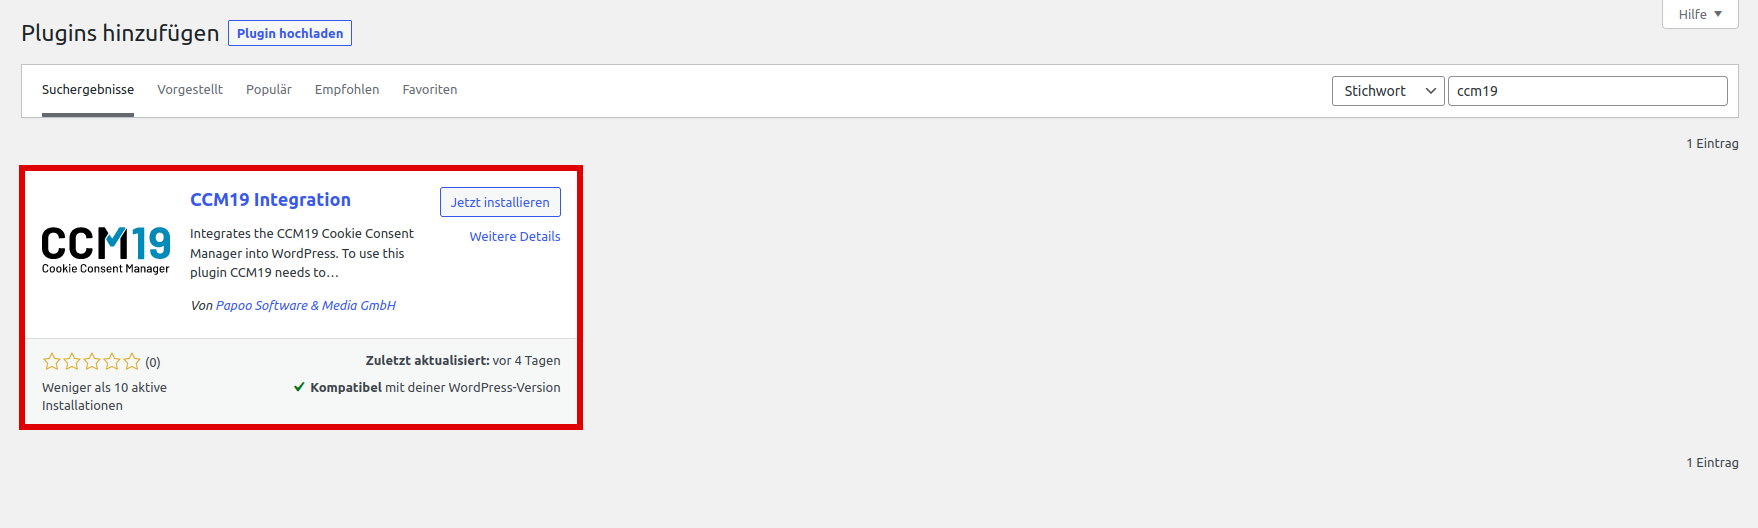
Select the Plugin
Then, on the left side of your WordPress-dashboard, navigate to the “Plugins” menu item. Use the search function and enter “ccm19.” Our “CCM19 Integration” plugin should then appear in the results. Click the “Install Now” button.
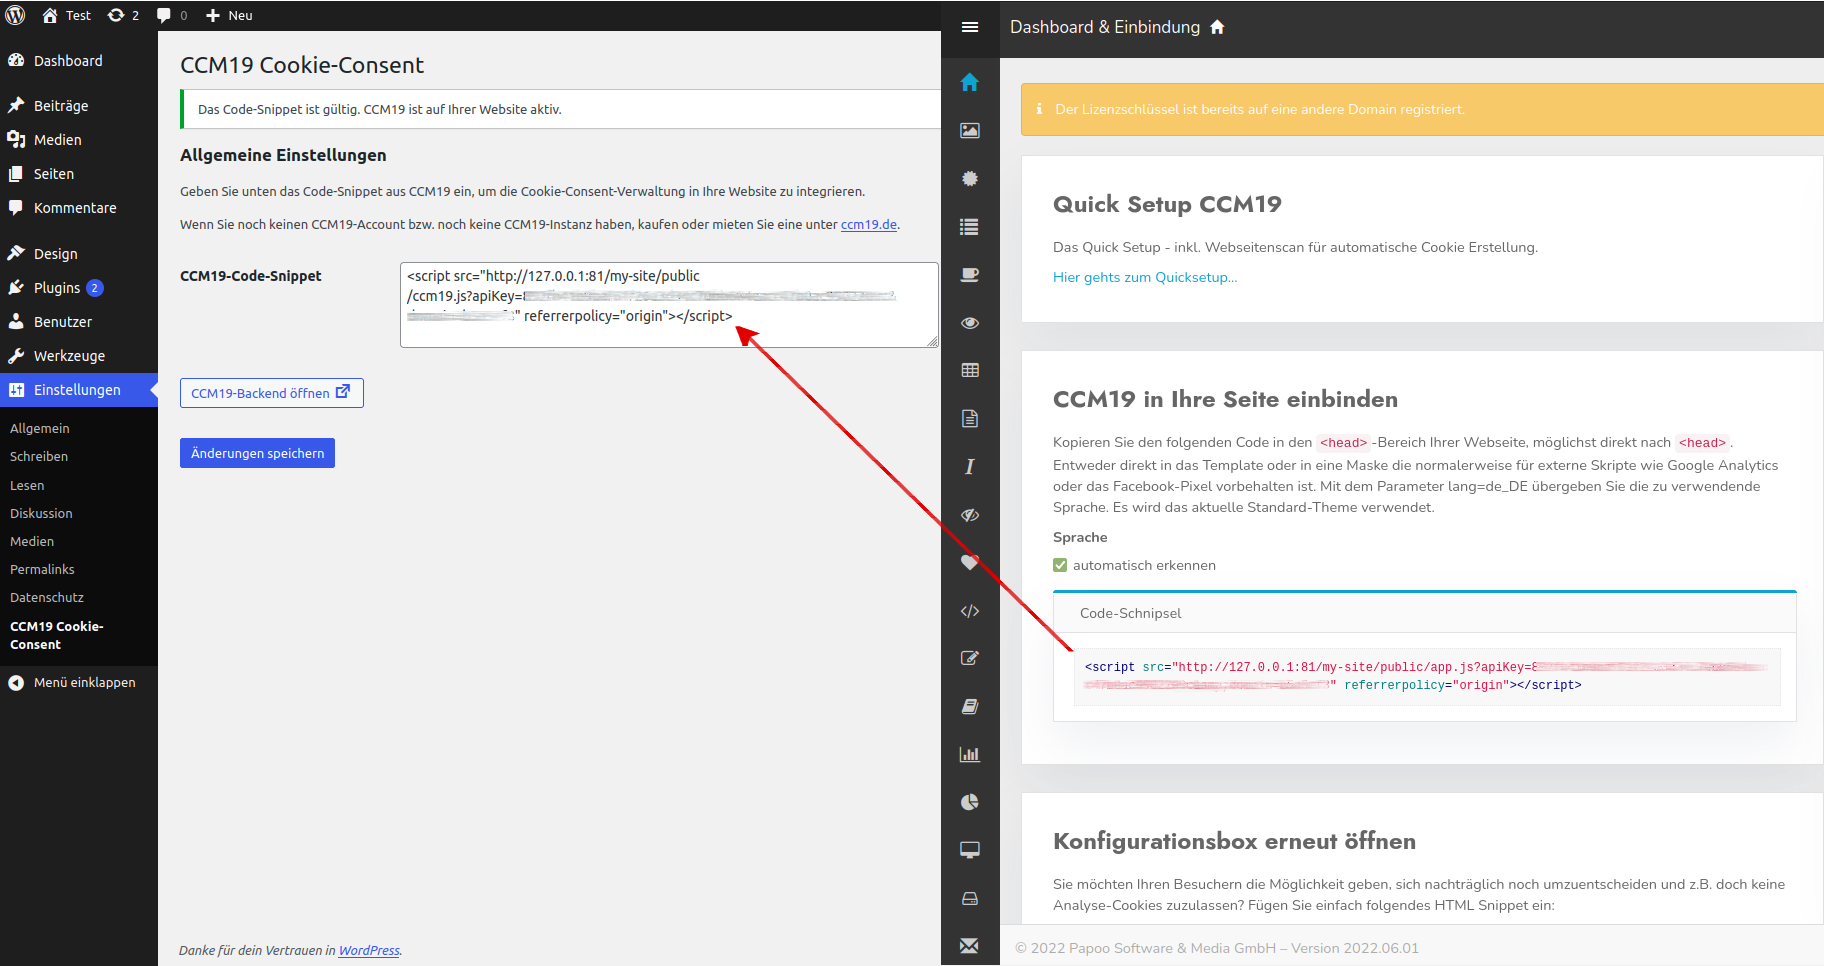
Configure the Plugin
A new menu item should now appear in the menu on the left under Settings (“CCM19 Cookie Consent”). Click this menu item and paste the code snippet-from the CCM19 dashboard into the input field. Then click "Save Changes."
Special Case When Using WP-Multisite
If you are using WordPress-Multisite, following the steps outlined above will result in an error when saving the code-snippet. To save the code correctly, please first complete the following steps before proceeding as described above:
- Click on "My Sites"
- Then click on "Network Admin"
- Select "Plugins"
- Then continue as described above ("Settings" → "CCM19 Cookie Consent")
If granular implementation is required—that is, different snippets for different web pages—this cannot be controlled via the network admin panel. In this case, the plugin must be installed via the network admin panel but then deactivated. The snippet is then inserted in the admin panel of the respective page itself (as described under “Configure Plugin”). The CCM19-WP-plugin must therefore only be activated at the page level!
Done
The Cookie Consent Manager should now be installed on your WordPress-site. When you visit the site, you should see the CCM19 cookie-banner.
Potential Issue with WPRocket or Other Caching-Plugins
If the banner does not appear after following the steps above, this is usually because a caching-plugin such as WPRocket is being used. In this case, you must define an exception for the CCM19 script so that the embedded CCM19-script is excluded from caching.
We describe here how to add such an exception.
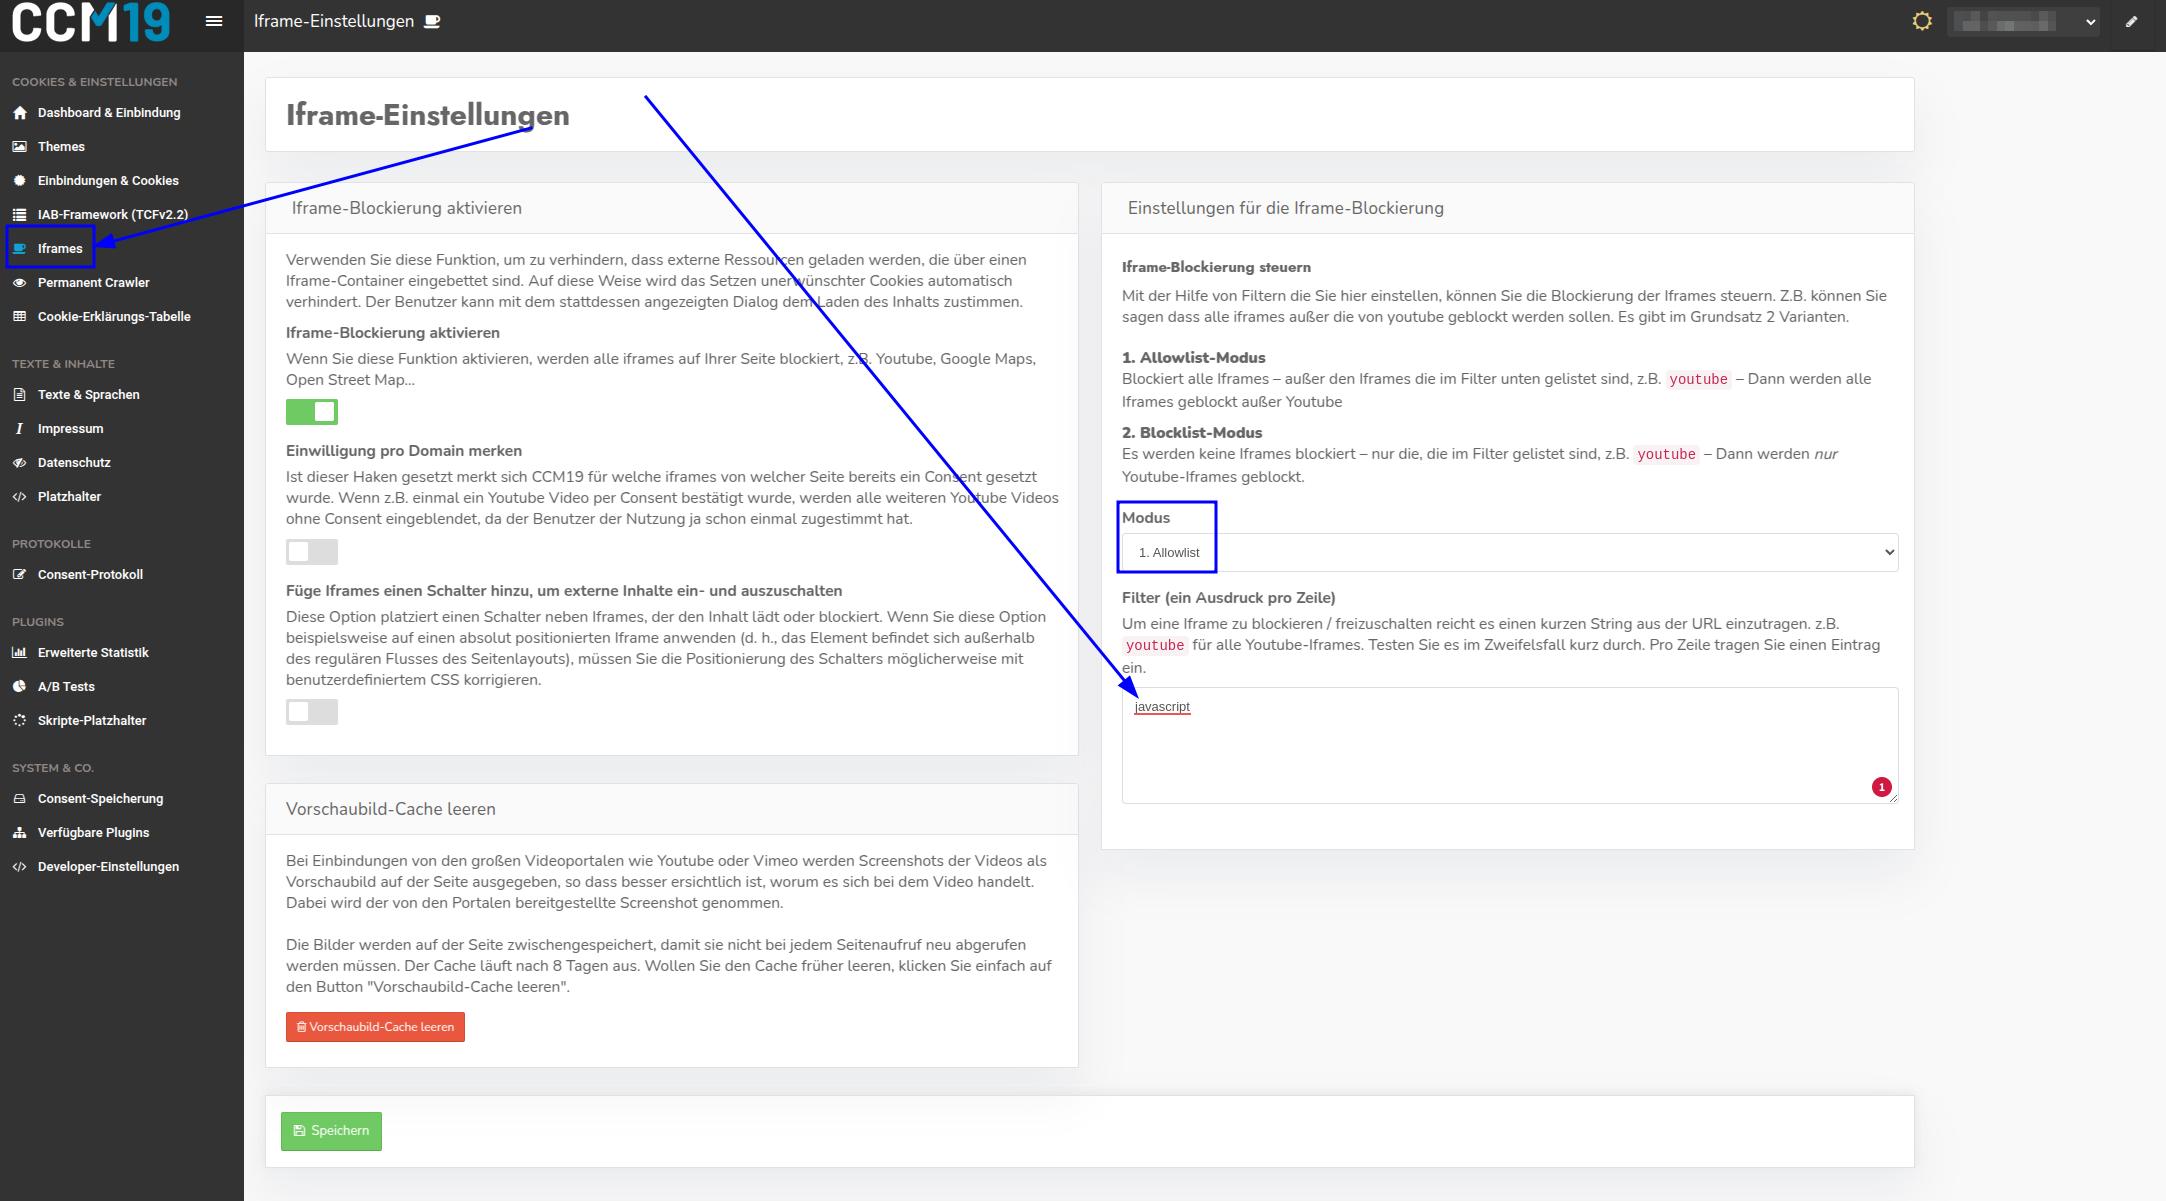
Potential Issues with the Divi-Theme and Divi-Builder
If you’re using the Divi-theme, you may encounter issues with the Divi-Builder after integrating the CCM19-code. When editing, the Divi-Builder generates an iframe, which CCM19 blocks under certain settings. To resolve this issue, log in to your CCM19-dashboard and select the appropriate domain. Then navigate to the “IFrames” menu item and add an exception for the term “javascript” to the allowlist. This prevents the Builder from being blocked by mistake.
Alternative Customization of the CCM19-Code-Snippets for the Divi-Theme
Additionally, when using the Divi-theme, you can directly customize the CCM19-code to avoid conflicts with the Divi-Builder. To do this, simply add the class class="et_fb_ignore" to the existing CCM19-code. This class prevents Divi from blocking the CCM19-script call during editing.
As a result of this adjustment, the CCM19-banner will no longer be displayed within the Divi-Builder itself. However, the banner remains fully functional on the published website.
The standard CCM19-code looks like this by default:
With the mentioned adjustment (class et_fb_ignore), the structure becomes as follows:
<script class="et_fb_ignore" src="https://cloud.ccm19.de/app.js?apiKey=xxx&domain=xxx" referrerpolicy="origin"></script>