How do I enable Google Consent Mode V2?
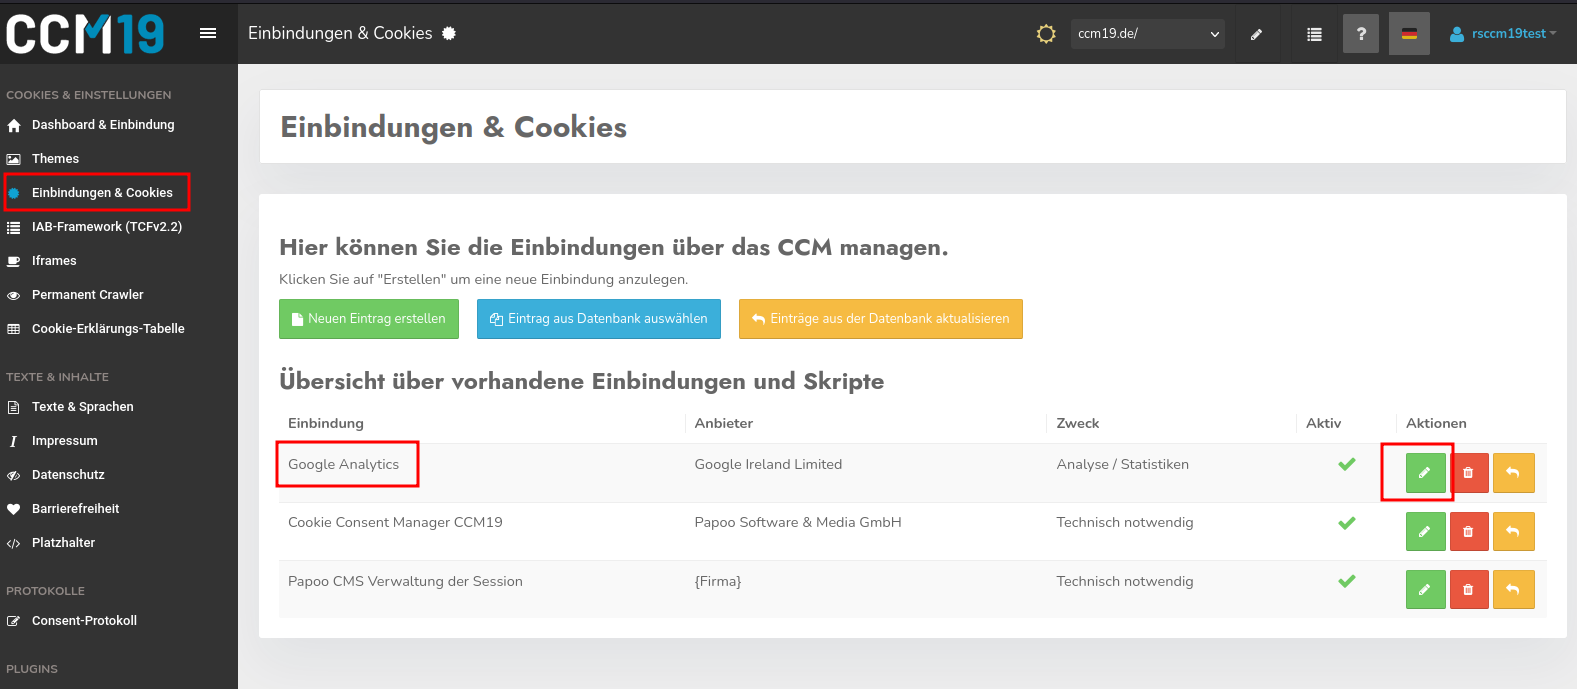
To enable Consent Mode in CCM19, you must edit the entry for the Google-application under the "Integrations & Cookies" menu item for which you want to enable Consent Mode. These are typically the “Google Analytics” or “Google Ads Conversion Tracking” entries.
To edit, click the pencil-icon in the “Google Analytics” row:
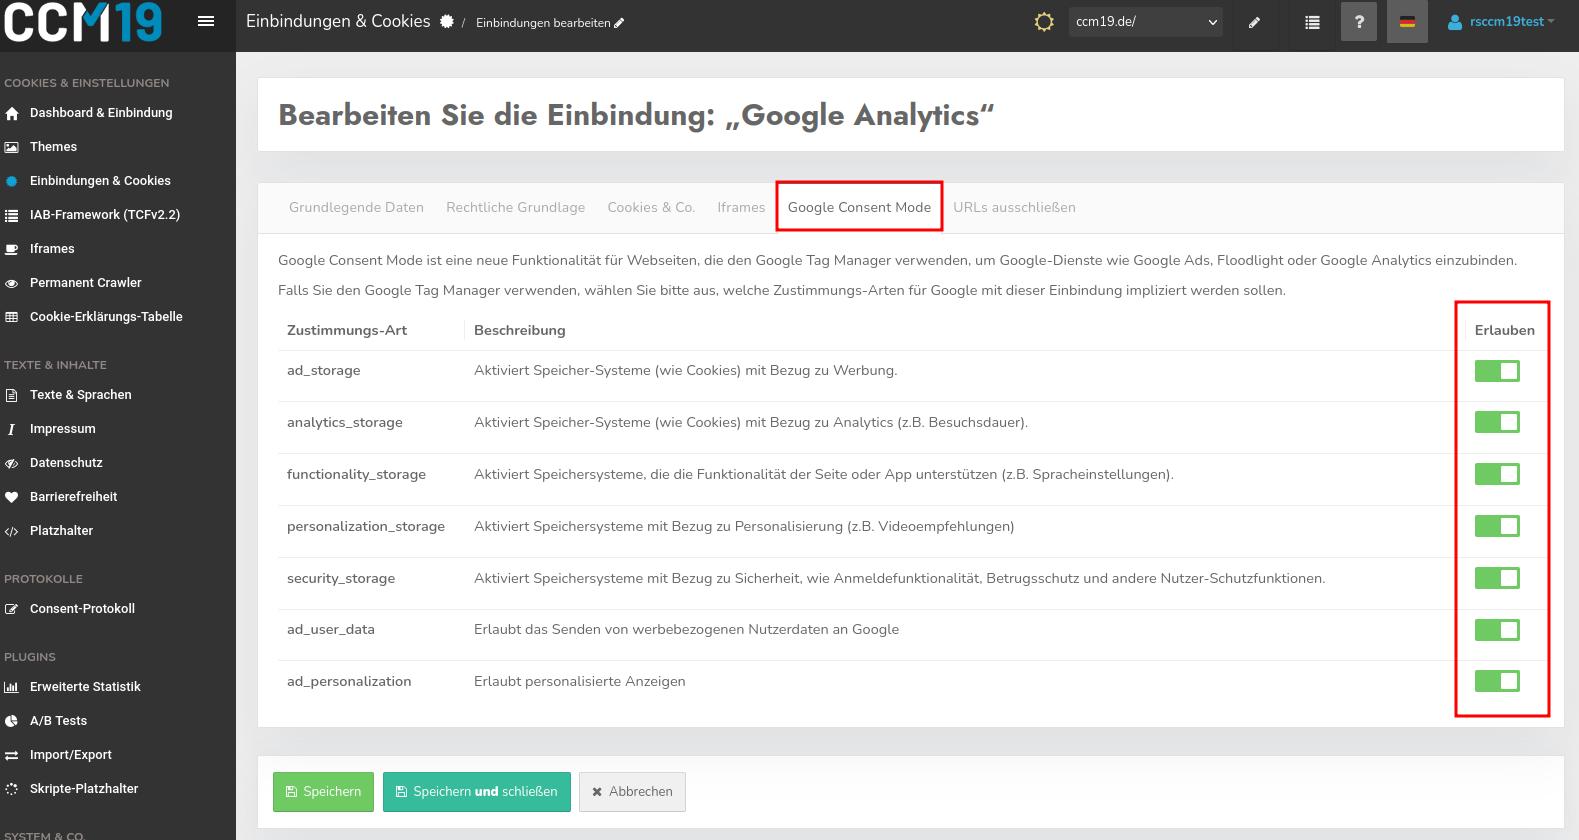
In the edit screen, you’ll find a tab for Google Consent Mode settings. Here, you can enable the consent types. For Google Consent Mode v2, the “ad_user_data” and “ad_personalization” entries must be enabled. Google Analytics, for example, also requires the consent types “ad_storage” and “analytics_storage.”
Google Consent Mode in Conjunction with Google Tag Manager
Google Consent Mode can also be integrated via Google Tag Manager. To this end, Google provides the ability within the tags to respond to the consent types. These consent types are already integrated into the templates for services such as Google Analytics or Google Ads Conversion Tracking, and generally no further settings are required in Tag Manager. You simply need to activate the consent types in the respective integrations within your CCM19-interface.

Important: With this method, Google Tag Manager is configured as technically necessary in CCM19. Therefore, the consent types for Consent Mode V2 must NOT be enabled in the Google Tag Manager integration in CCM19. Since Google Tag Manager is never blocked, this would result in the consent types always being assigned the status granted .
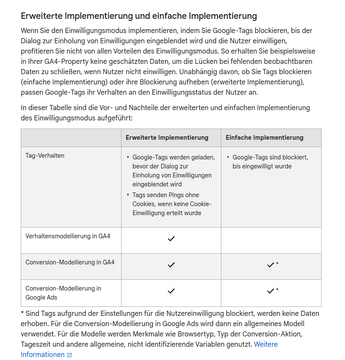
Google Consent Mode V2: Basic and Advanced
Google offers website operators the option to enable Advanced Mode. For Basic Mode, it is sufficient to activate the consent types but to load the integrations only with the user’s consent—as the GDPR essentially requires. CCM19 provides various blocking methods for this purpose, of which the “-” blocking is enabled by default if you retrieve the embeds from our database.
For Advanced Mode, Google recommends disabling all blocking settings so that Google can determine which data to process based solely on the types of consent. This allows Google to model user behavior based on anonymized data when no consent has been given, which provides you with more data. Before activating Advanced Mode, you should have your data protection attorney verify whether this complies with data protection laws.
Here’s how to proceed if you want to use Advanced Mode:
- If present, remove the blocking settings from the corresponding integrations in CCM19, on the website, or in Google Tag Manager.
- Set the Google Tag Manager category in CCM19 to "Technically Necessary."
- Ensure that tags can load independently of CCM19 (e.g., the "All Pages" trigger for Google Analytics 4).
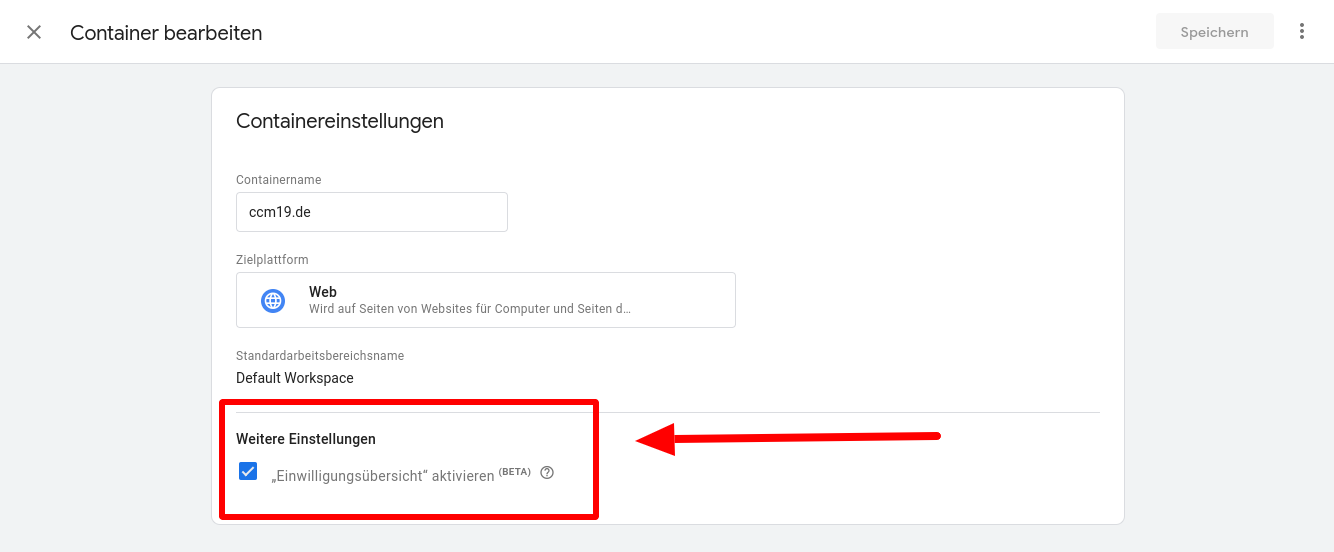
View Google Consent Mode in Google Tag Manager
In your container, navigate to "Administration" and go to "Container Settings." Under "Additional Settings," you can make Consent Mode V2 visible for tags in the tag overview.
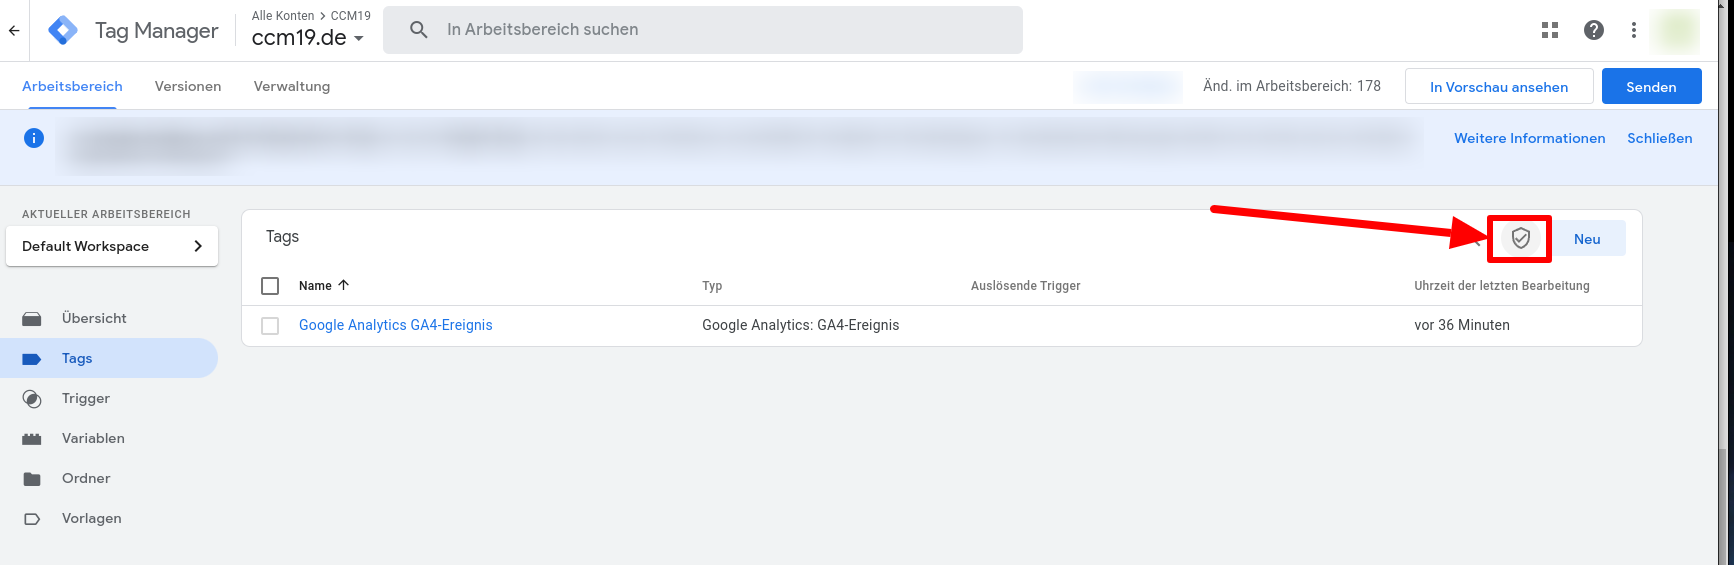
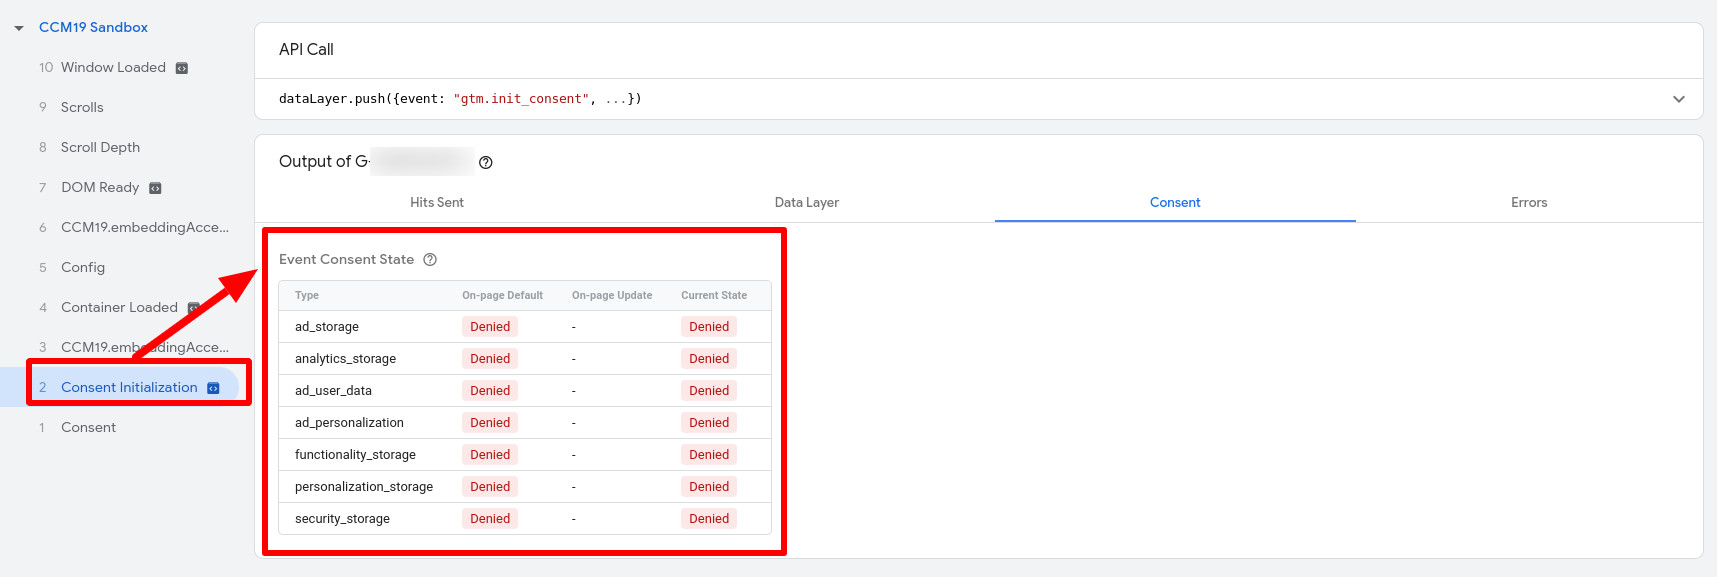
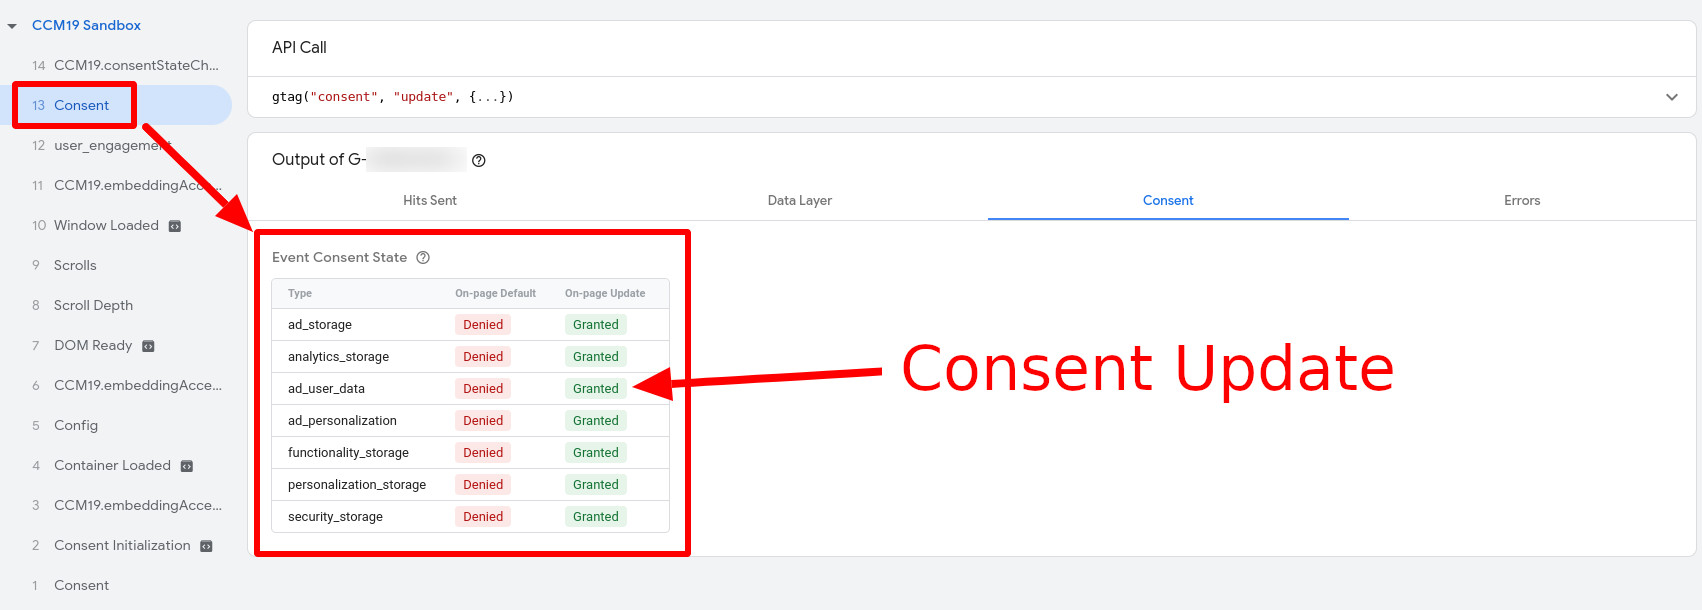
Verification in the Tag Assistant
In Google Tag Manager, you can preview the containers. This allows you to track events and the Data Layer step by step. You can also verify Consent Mode during this process.
Without consent, the consent types are assigned the status denied. This changes to granted as soon as consent is given in the banner.