Integrating Google reCAPTCHA in a Data-Protection-Compliant and Functional Way – Step by Step
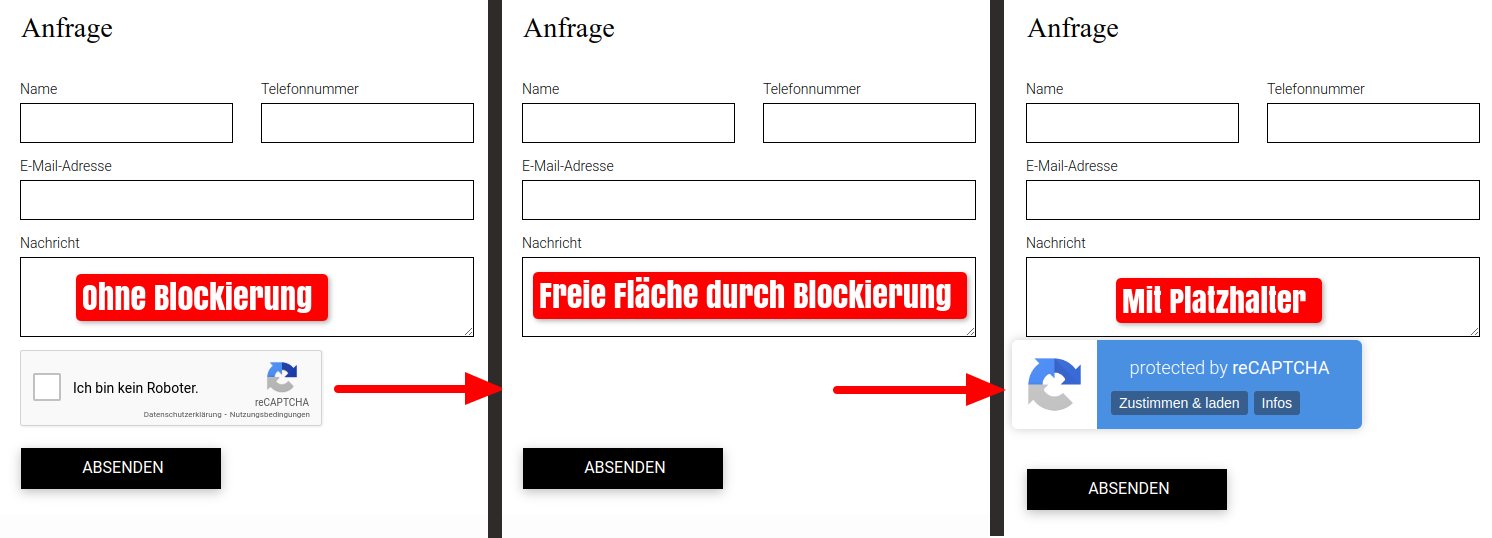
Since Google’s popular and effective spam protection establishes connections to external servers, the application must not be loaded without the consent of website visitors. However, this means that reCAPTCHA cannot be displayed to website visitors who have not given their consent to load external content. This creates the problem that these visitors cannot submit forms protected by reCAPTCHA.
Using CCM19, you can easily display a button in your forms with the help of the script-and the placeholder-plugin, allowing visitors to give their consent to reCAPTCHA within the form.
Here is an example of how it looks:
1. Add a reCAPTCHA “-” Integration
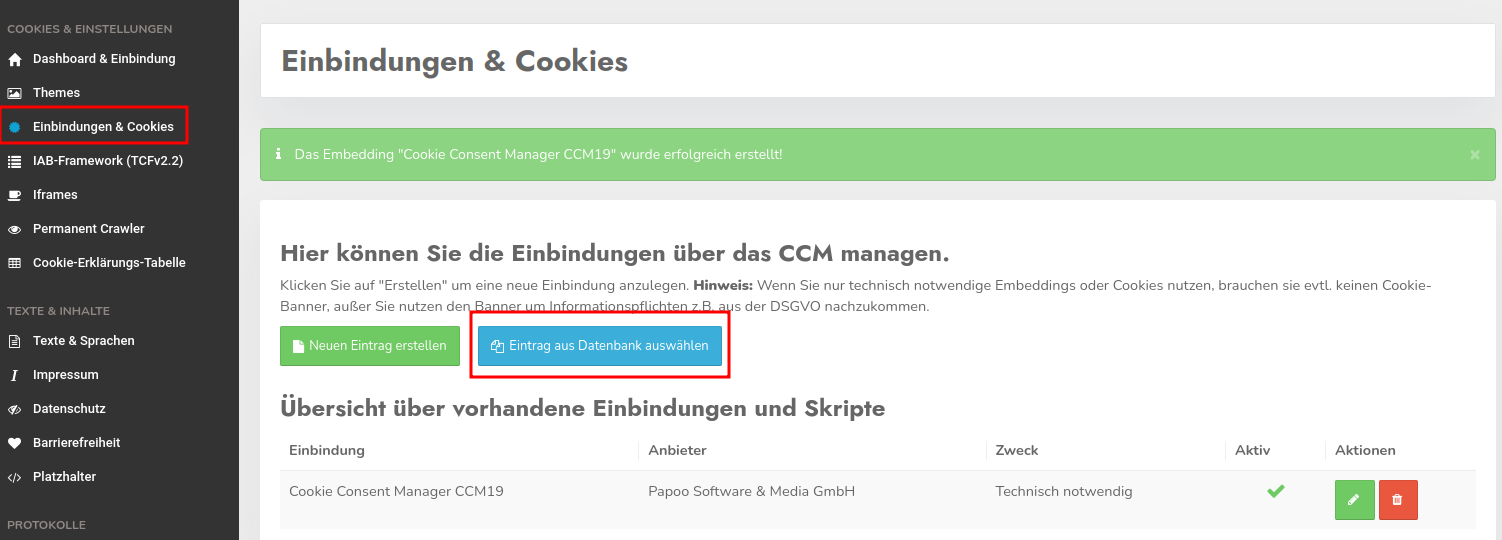
First, you’ll need a reCAPTCHA entry under “Integrations & Cookies” as a starting point. It’s quite possible that this entry was already automatically generated during the onboarding process. If so, you can skip to step 2 and proceed with setting up the placeholder.\ If not, you’ll need to add the entry manually. To do this, simply click the blue “Select Entry from Database” button.
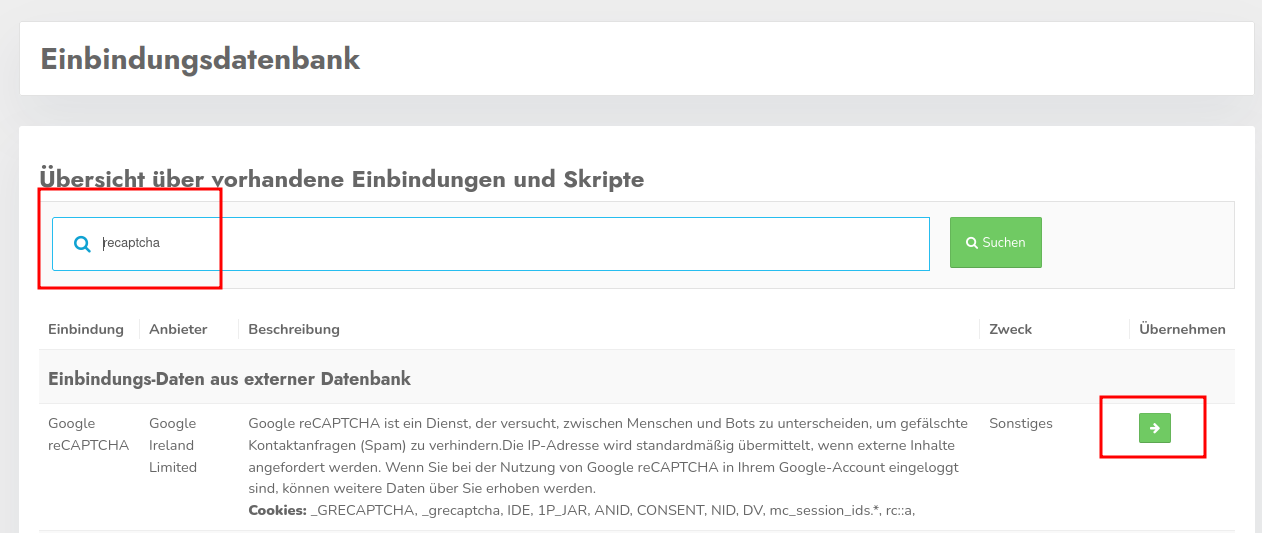
Then search the integration database for the reCAPTCHA template. You can select the entry you found by clicking the green arrow.
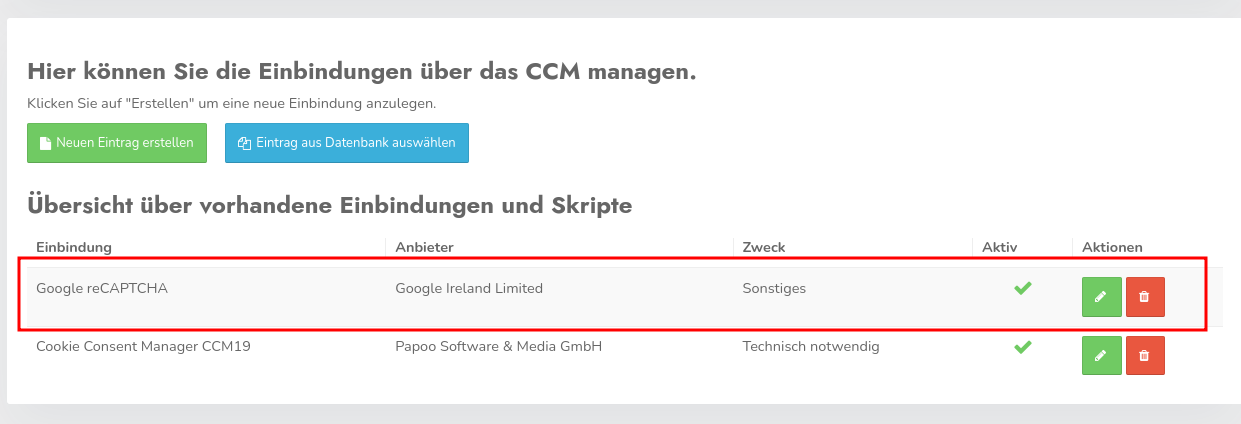
Save the integration by clicking “Save and Close.”
This adds Google reCAPTCHA as an integration to the list:
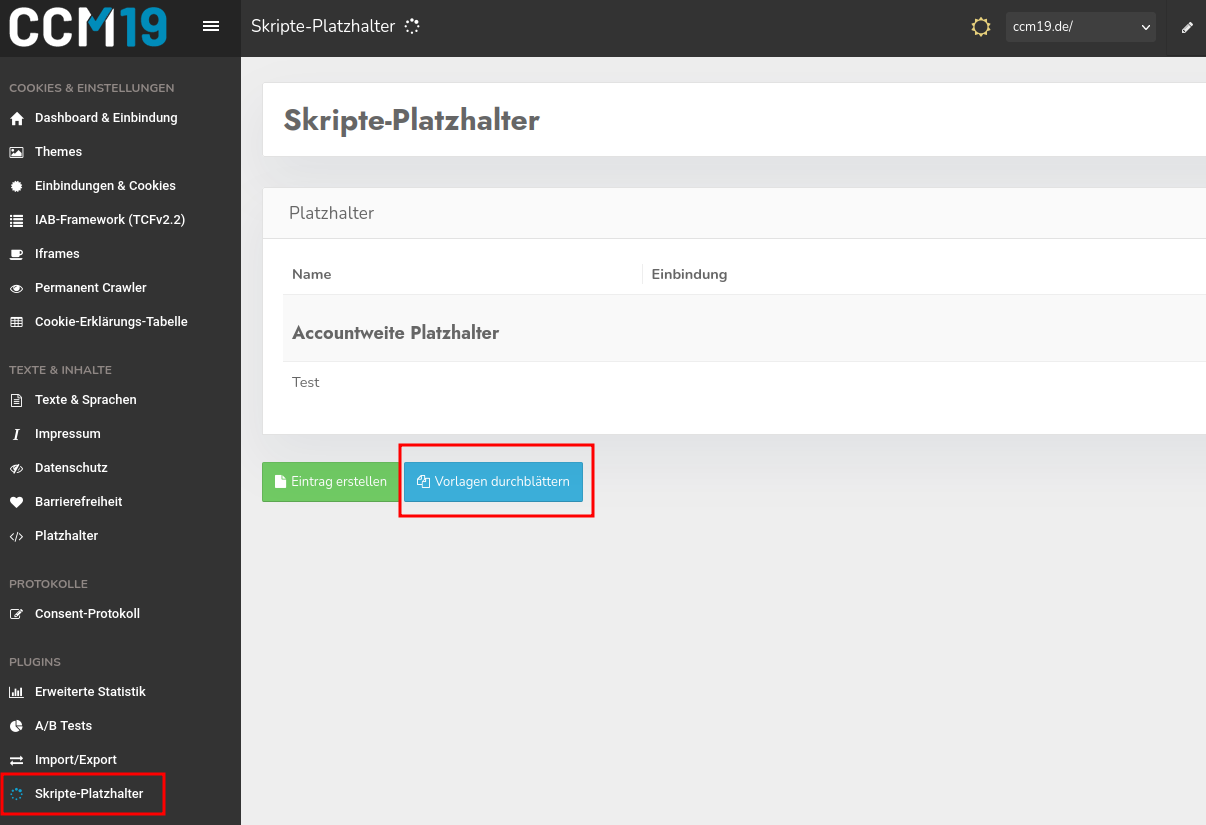
2. Add a “-” placeholder from a template
This integration will now ensure that reCAPTCHA is blocked by default if cookies are not accepted via the “-” cookie banner. To ensure that the forms can still be used, you must now use the “Scripts-Placeholders” feature to generate a button that allows reCAPTCHA to be enabled later; this button will be displayed below the form in place of the reCAPTCHA.
To make this easier for you, we’ve already provided a design for this button as a template. So navigate to the “Scripts-Placeholders” menu item and select “Browse Templates” there.
In the template list, you’ll find the suggestion for Google reCAPTCHA. Select this entry by clicking on it.
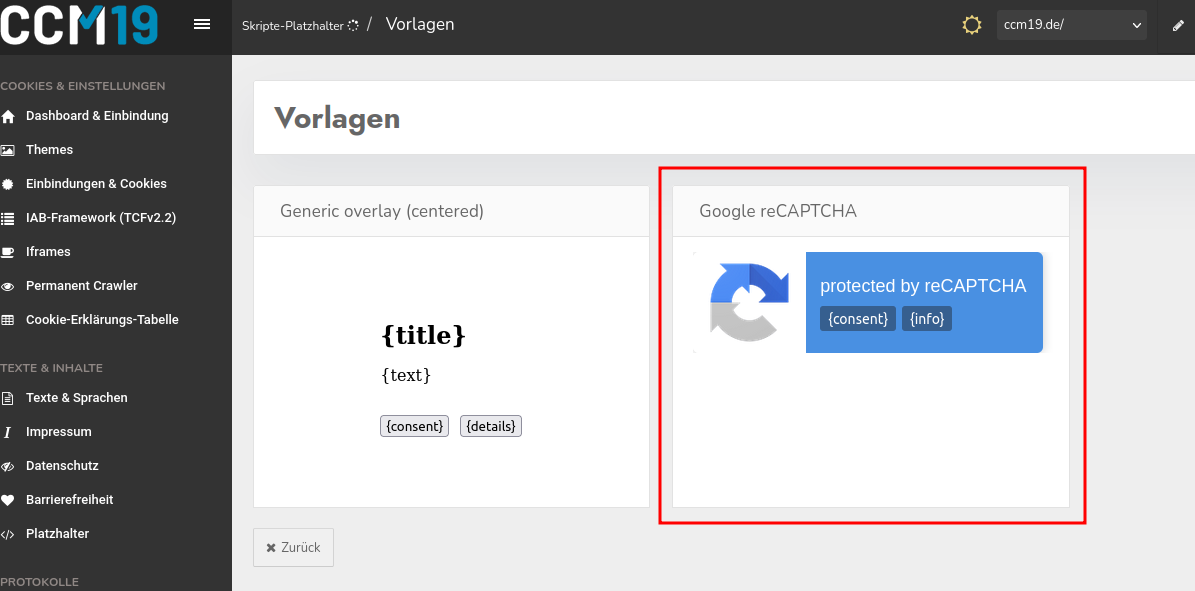
_You only need to add two things.
1. From the “Integration” drop-down menu, select the entry for Google reCAPTCHA. The name will match the name of the entry under “Integrations & Cookies.”
2. Click the “Active”-toggle to activate the placeholder.

Now simply click “Create” to complete the setup of the placeholder. Ideally, the placeholder should already be displayed in the form.\ If this is not the case, you may need to adjust other settings. Please proceed to the third step.
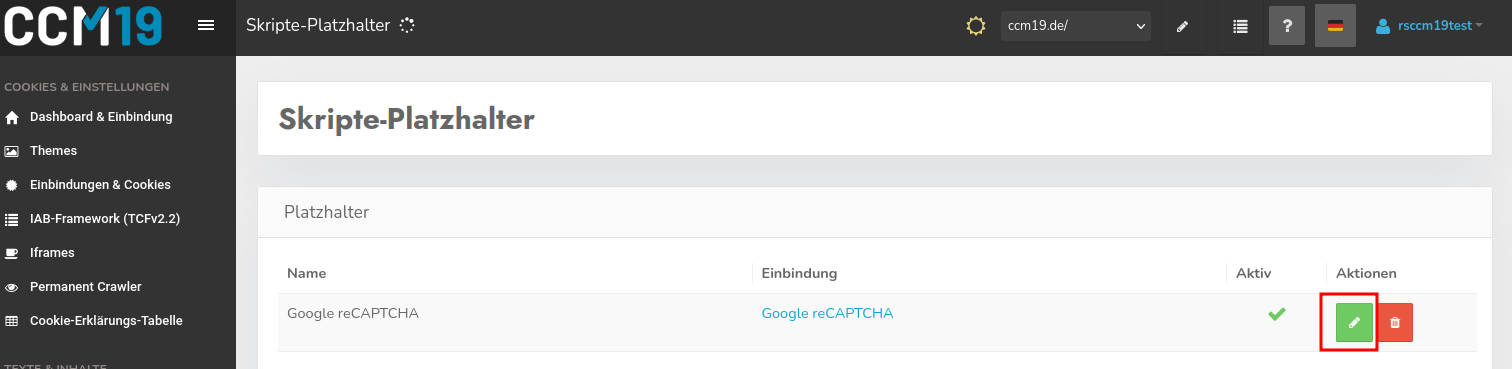
3. Customize the “-” placeholder
To configure the “-” placeholder, click the green pencil-icon.
If the placeholder is not yet displayed, you may need to specify a different CSS-selector. You can do this in the “Content” tab. If you’re familiar with your browser’s developer tools, you can likely determine a suitable selector yourself. If you’re unsure what to enter here, simply contact our support team.
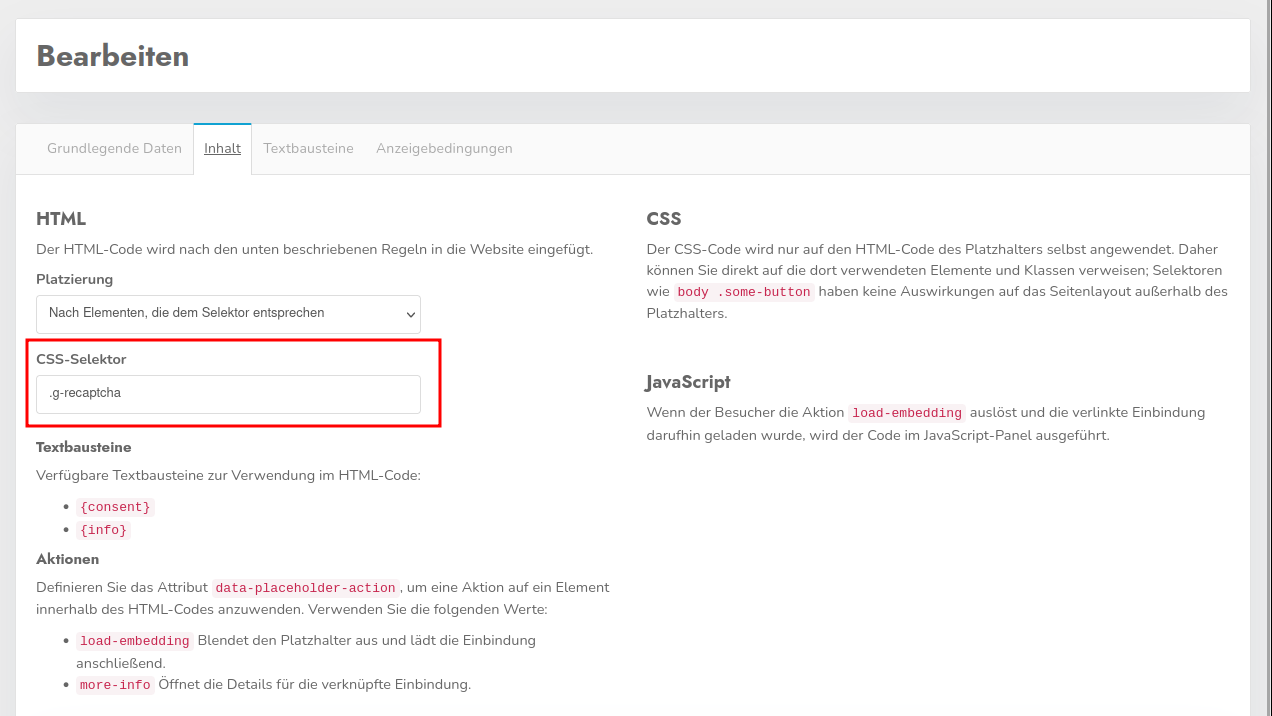
Under the “Text Blocks” tab, you can optionally customize the text in the placeholder.
