Customers
Within the CCM19 Enterprise / Agency-version, you can manage your own customers. Each customer can log in with their own credentials and manage their own domains within their account.
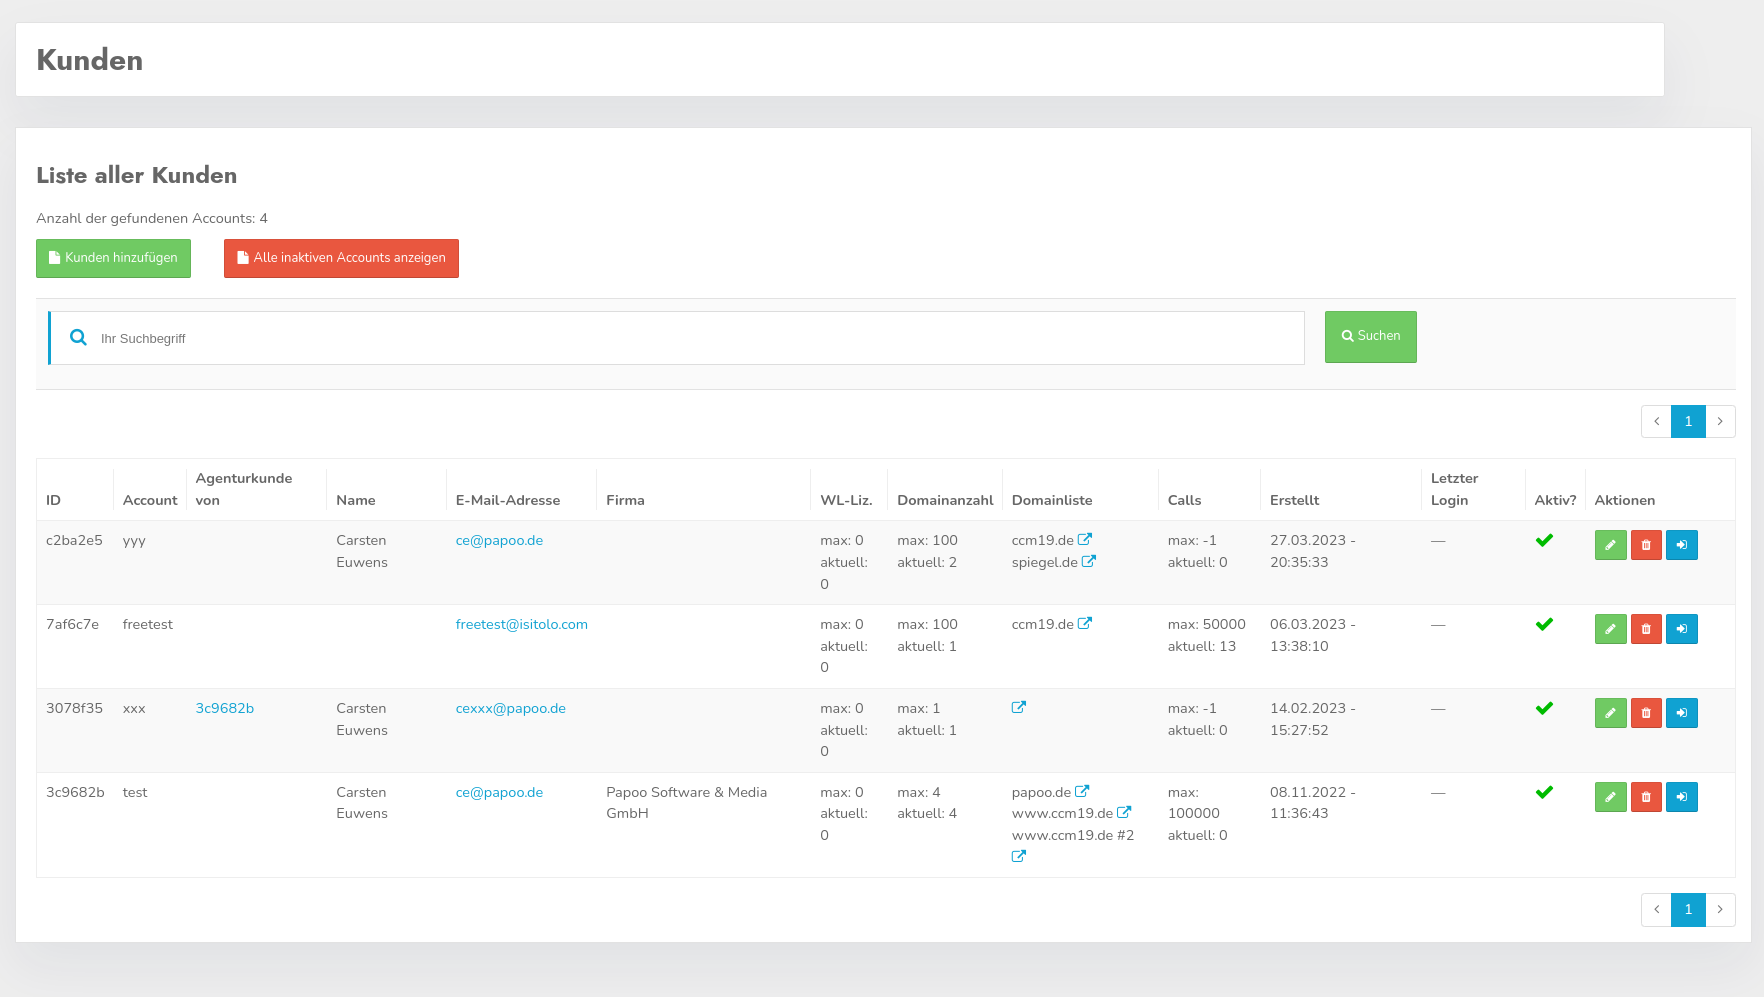
Here you can see an overview of the customers in your database. You can have as many as you like. You can open a customer’s domains by clicking the icon next to the link. The page opens in a new tab.
Create a New Customer / Edit a Customer
Clicking the green "Add Customers" button opens the corresponding form.

Create Customer Form
Here you can enter the important basic information for new customers. You can use this form if you do not manage customers in your installation via the API.
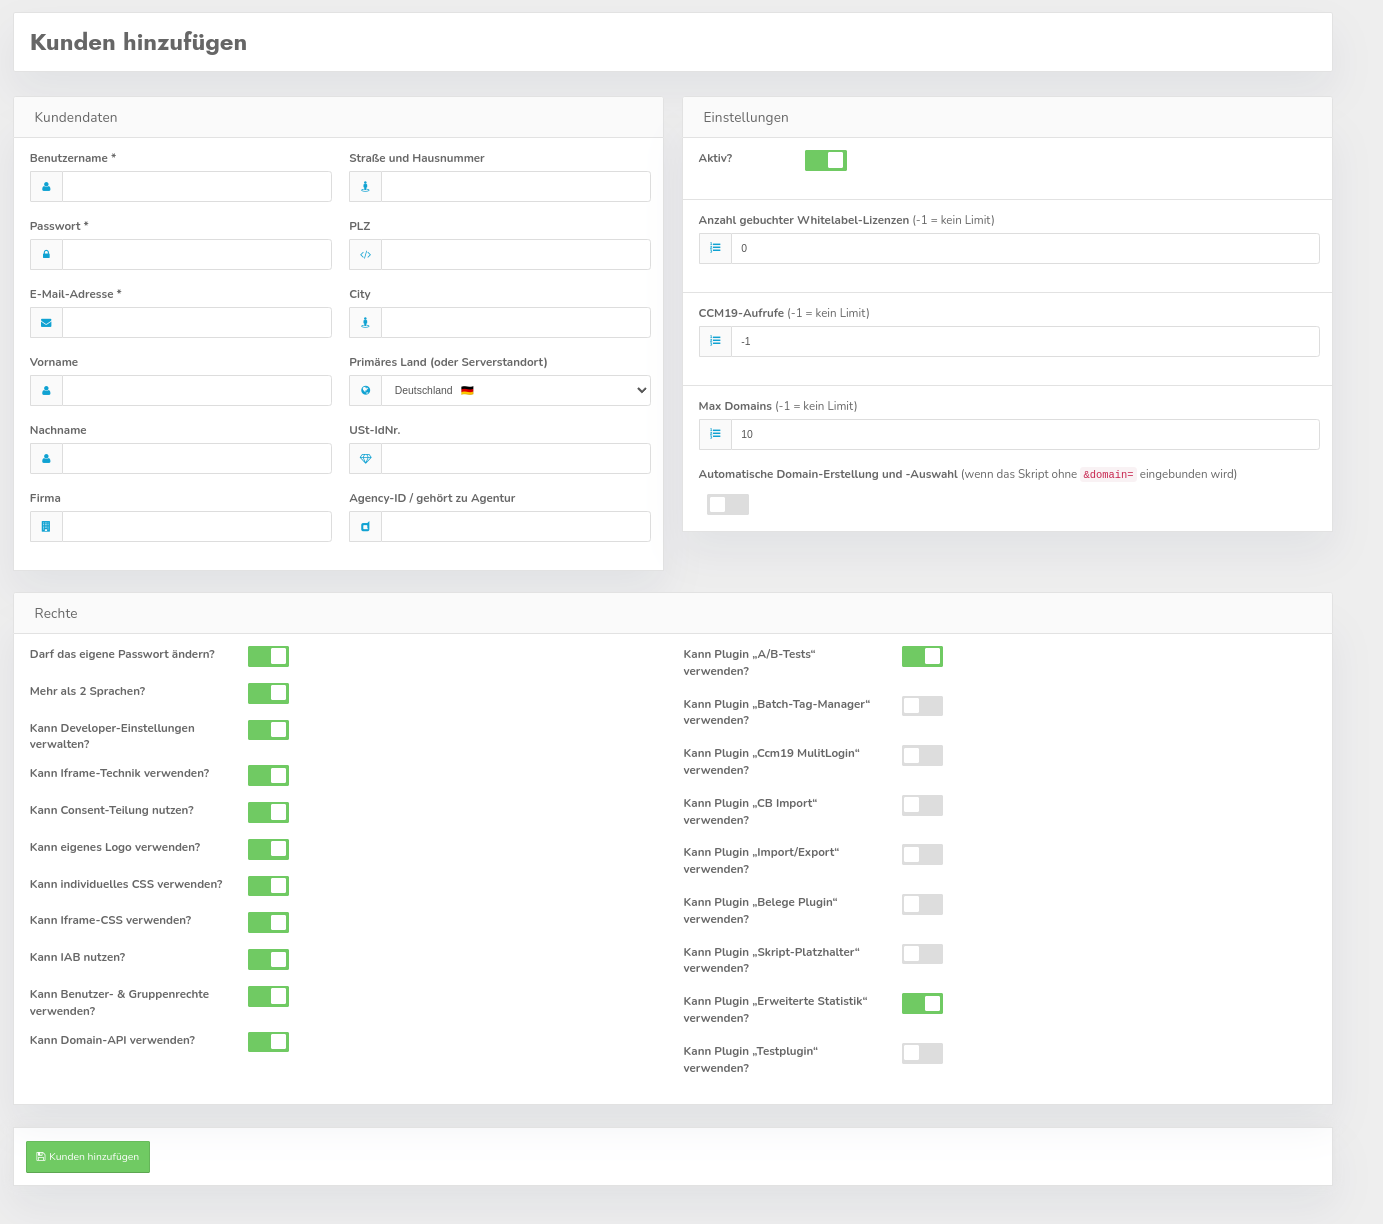
Required Fields for New Customers
The fields -, Username,-, Password,-, and E-, Email Address
are required fields that must always be filled in. The remaining fields are primarily for statistical purposes and can, of course, be synchronized with your billing system.
The "Agency-Id" field can be used to link accounts together if the Agency-plugin is permitted for use. This is typically available only to Enterprise customers.
Activate
The "Active" toggle switches a customer to active or deactivates them.
NoLabel Licenses
Here you can define how many NoLabel licenses each user has available in their account. Customers can then freely distribute these across their domains. NoLabel means that your customers can remove the “-powered by” link from the frontend widget.
Available CCM19 Calls
Here, you set how many calls should be available to each customer. “ -” 1 means there is no limit. You are free to decide this as well. The number of calls is distributed across the domains.
Max Number of Domains
Here you can set how many domains customers have available in their accounts. The same rule applies here: -1 = no limit.
Automatic Domain Creation
This is a somewhat delicate automated feature. It allows customers to embed a code into their website without individual domain-detection. In other words, the embedded link does not contain the parameter domainid=1234.
Domains are thus created automatically as well. This means that when you embed the code and CCM19 detects the code on an unknown domain, an entry is created in the database. The domain then appears in the domain listing in the backend, where the corresponding entry can be managed.
However, false positives may occur here if, for example, domains like Google embed the page as an iframe or access the page via proxies.
So you should keep a close eye on what’s happening here.
Permissions
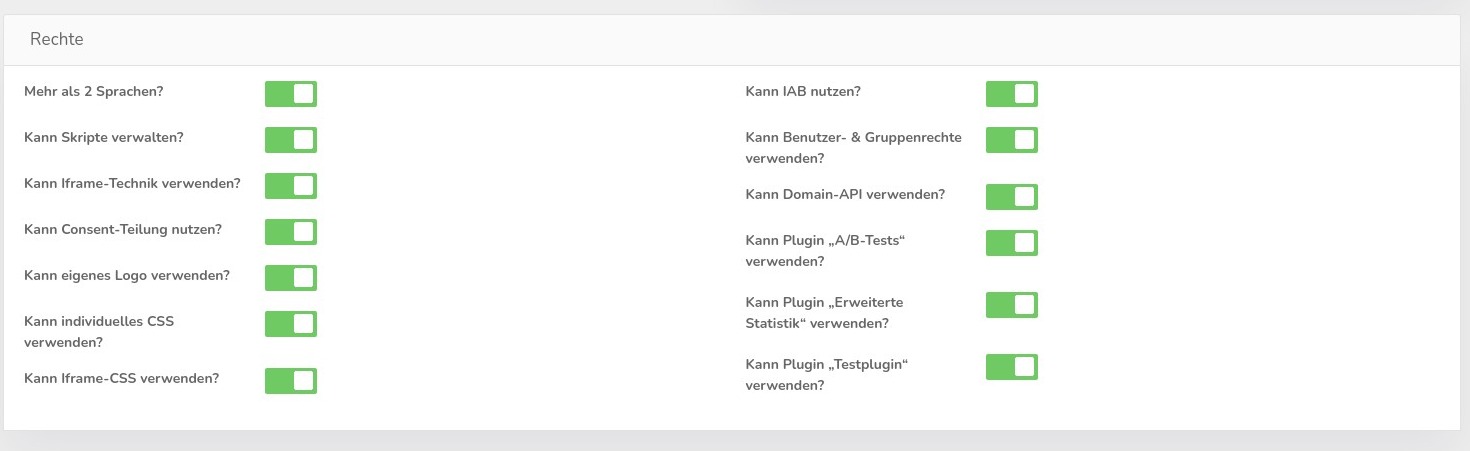
Here you can configure which permissions each customer should have. Using the detailed settings, you can specify exactly what customers have access to and what they do not.
By default, new customers are created with access to everything. Therefore, adjustments need to be made here only if you do not want this to be the case.
Access to the plugins can also be modified here, independent of the plugins’ own rules. The following applies:
- The plugin is enabled for everyone.
- A user has no access to the plugin according to the user-settings because the checkbox is not selected.
The user-settings thus override the plugin-settings, which therefore only apply if the corresponding access is granted.
Editing Customers
When you edit a customer record, you’ll see some additional information in the “CCM19-Views” section.
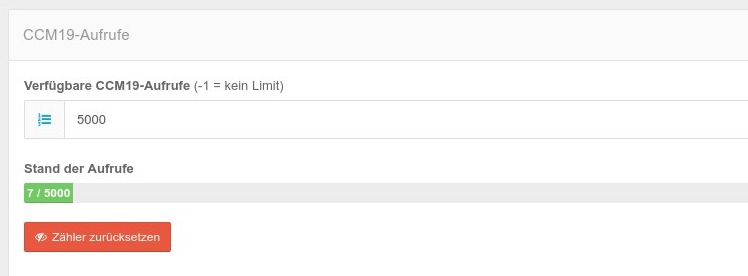
This section displays the actual number of views as well as a button to reset the counter for the current month.
Overview of Existing Customers
You can find a list of your customers by clicking the "Customers" menu item on the left side of the menu.
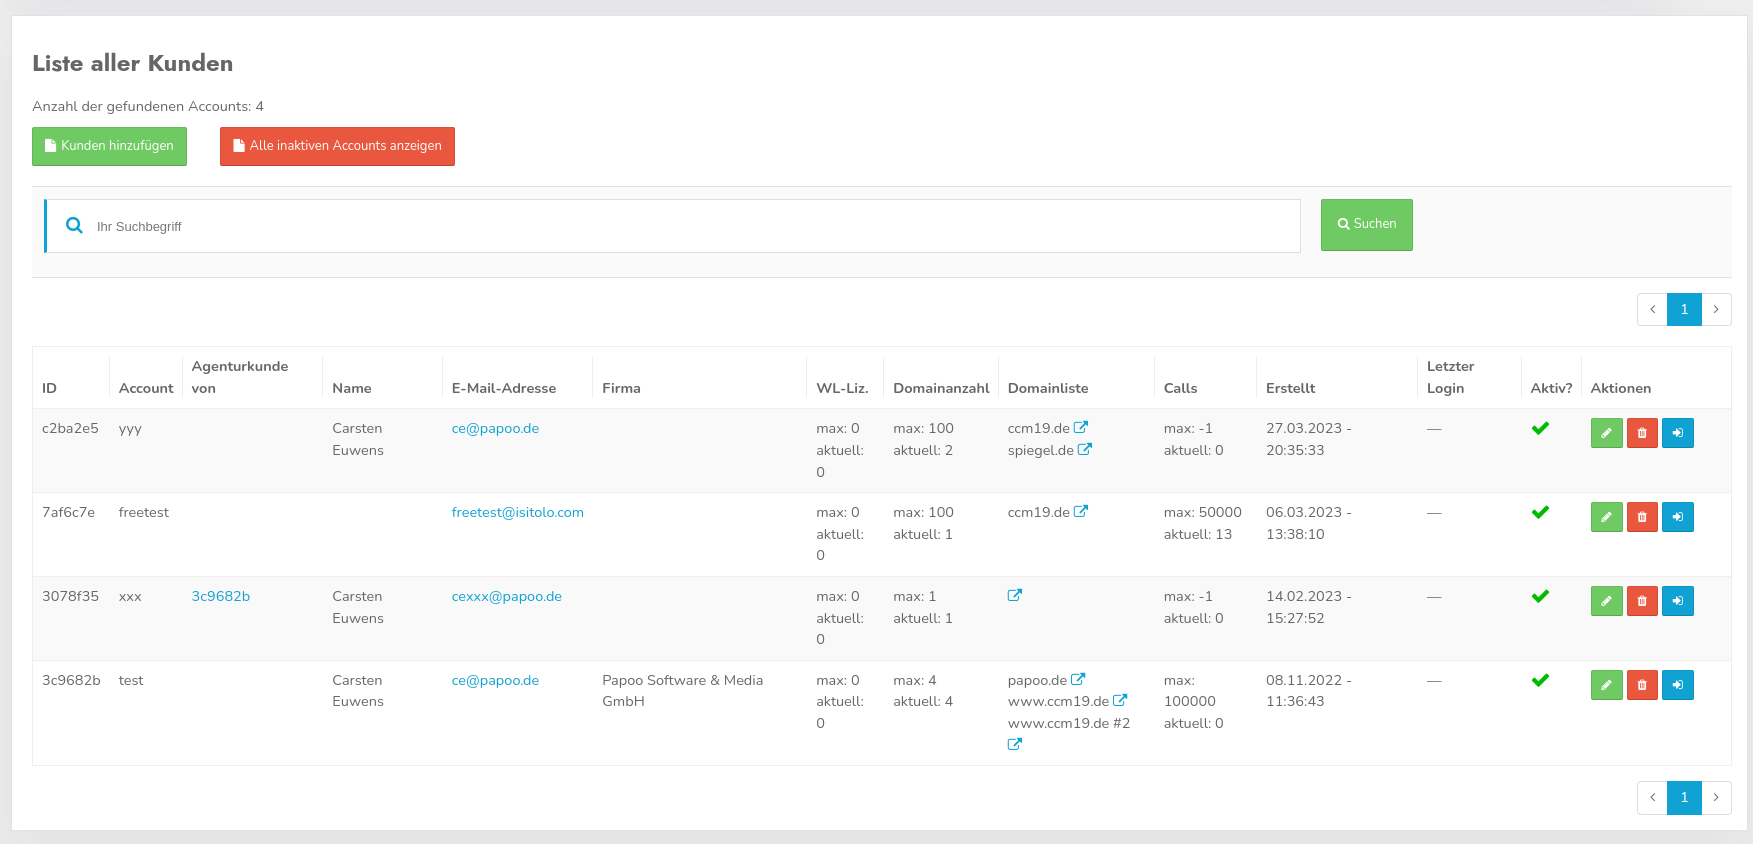
The list displays your customers’ basic information, such as how many accesses and domains are allowed and in use.
You’ll also see an overview of the domains the customer is using. In the overview, you’ll see a test customer whose domains we’ve copied repeatedly for demonstration purposes.
It also shows when the customer last logged in and whether the customer is currently active.
Edit
Click the green button with the pencil-icon to access the edit screen—this is the same screen as the one above for creating new users.
Delete Customers
Use the red trash can button to delete a customer (upon request).
Log In to a Customer’s-Account
Use the blue button to log in to the respective customer’s-account without a password. Please note, however, that you must obtain prior authorization from your customer to do so.
Search for Customers
You can use the search form to look for specific customers. The search function scans all customer records and then lists the matching results.