CCM19 Upgrade to Generation 2
If you are using a version purchased after October 13, 2020, this does not apply to you. For everyone else:
With the release of version 13.10.2020, the CCM19 Cookie Consent Tool was redesigned to display and process integrations instead of using “only” cookies.
The old Generation 1 version will continue to be supported at least until the end of March 2021, but will generally no longer receive new features—only bug fixes.
In the old consent screen, you could only accept or reject categories; with the new version, you can now not only check the categories but also the individual integrations.
Google Analytics is a good example. Whereas you previously had to enter each cookie separately, it’s now enough to select a Google Analytics entry from the database, and all associated cookies and elements are automatically created. Visitors can then choose whether they want to use Google Analytics or not.
If you’ve been using an older version of Generation 1, you can perform a manual upgrade to Generation 2. Unfortunately, an automatic upgrade isn’t possible because we don’t know all the cookies and their relationships.
But don’t worry— - —the upgrade is actually quite simple to perform and usually takes about 5 minutes
Performing the Upgrade
There are two ways to perform the upgrade.
- Switching the software via selection; in this case, the entries must be recreated manually
- Upgrading via extended onboarding -; in this case, almost everything can be done automatically.
1. Migration via Selection
To perform the migration manually, go to the “Frontend Behavior” menu item on the left. There, you’ll find the following new entry. First, uncheck the box marked in red and read the text there carefully (-).
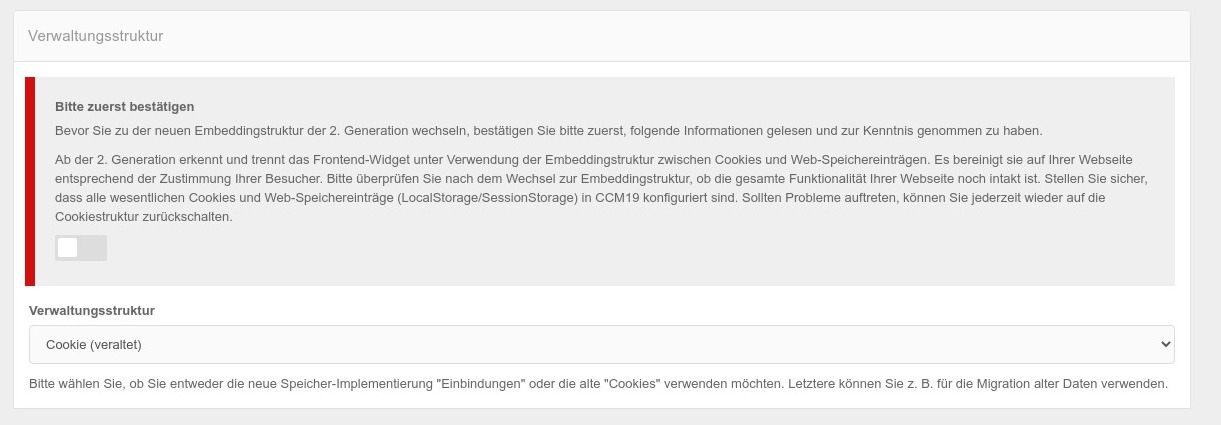
You can then change the dropdown menu from “Cookie (Deprecated)” to “Embeddings.” Once you’ve done this, the “Cookies” menu item will be replaced by “Embeddings and Cookies,” and a new form will be available.
At the same time, the consent form in the frontend will also be updated. You can now create the new embeddings under this menu item; this is explained here.
2. Switch via Extended Onboarding
You can perform the migration via the extended onboarding process by accessing the old “Cookies” menu item. To ensure this works, you should not yet perform the migration described in section 1.
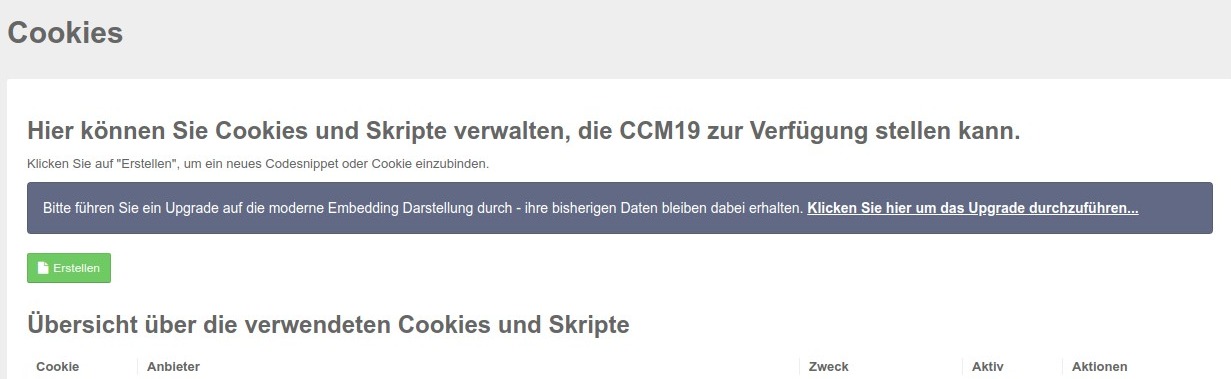
To do this, click the link “Click here to perform the upgrade.” You will then be taken to the familiar screen from the onboarding process.
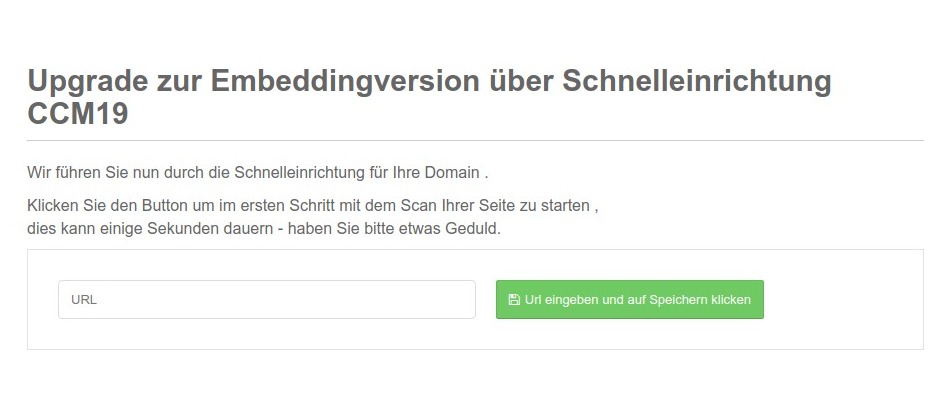
For the download version, you must now enter the currently used page URL; in our cloud version, this is not necessary, as the domain is already known based on your selection. Then follow the on-screen instructions; after the scan, you’ll be taken to the familiar screen and the process already described here.
Once you’ve completed the onboarding process, you’ll be taken to the list of embeddings, which you can then edit again. As described here.