Wix
To install our Cookie Consent Manager on your Wix-blog or your Wix-website, simply follow these steps:
Log in to your Wix-account
Log in to your Wix account.
Select a website
In the website overview, select the website where you want to integrate CCM19.
Open the website dashboard
In the website dashboard, open the Settings. You’ll find the link at the very bottom of the left-hand navigation bar:

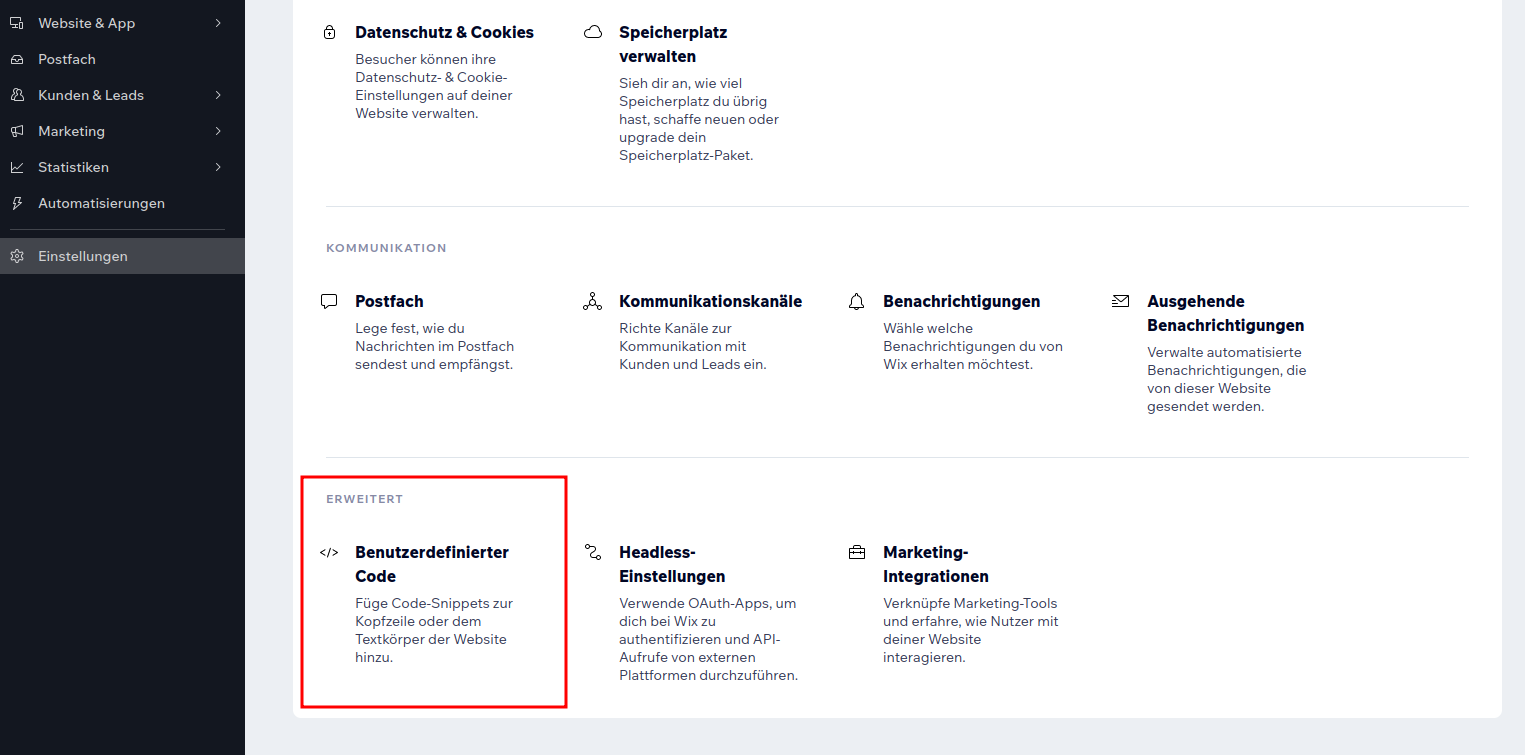
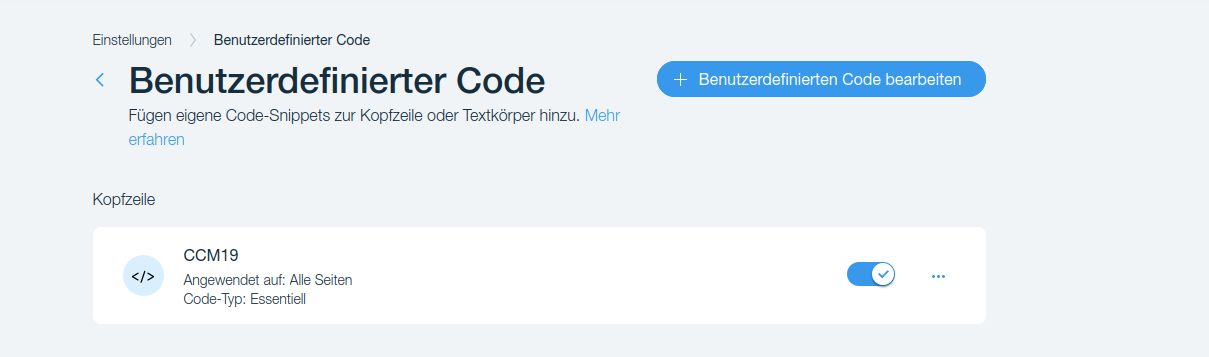
Open "Custom Code"
Scroll all the way to the bottom of the list of available settings. There, in the last row, you’ll find the "Custom Code" option. Click on it:
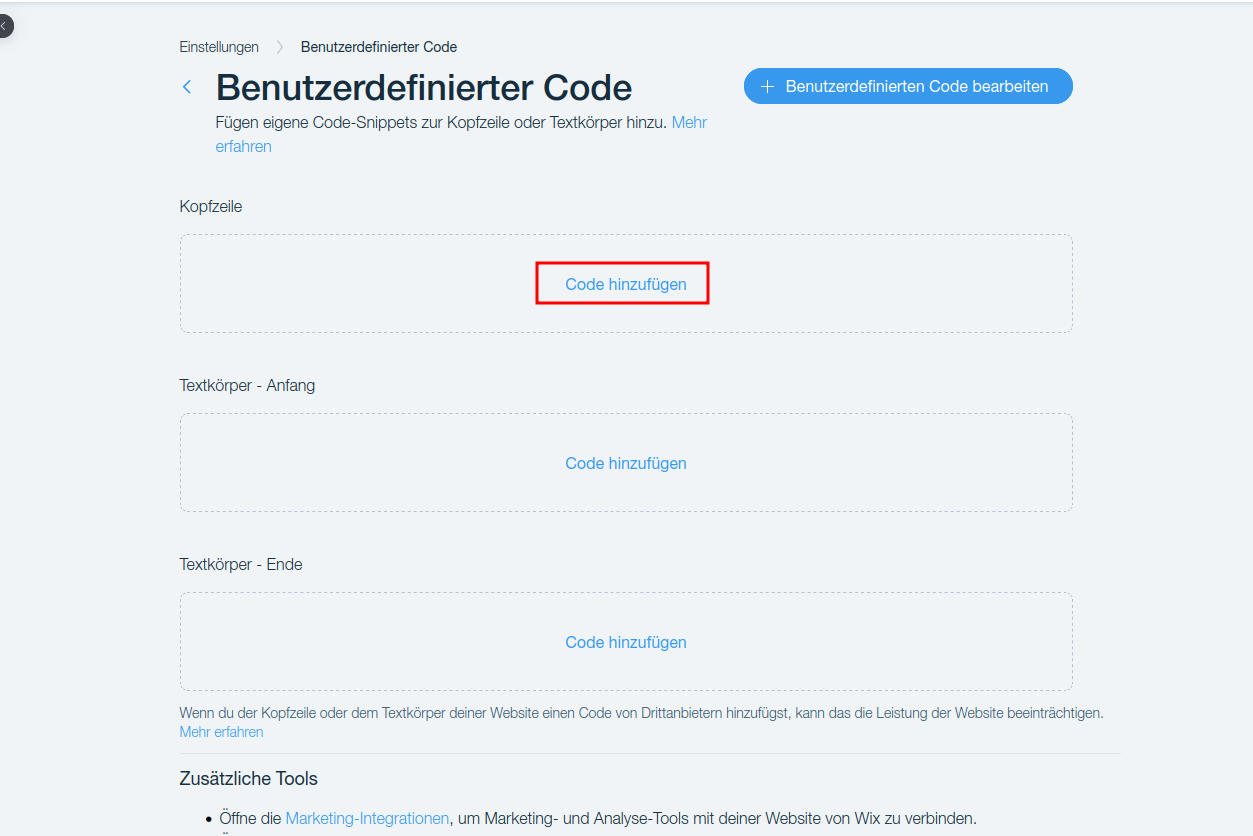
Insert CCM19 into the header
You will now see three areas where you can add scripts. We want to insert the CCM19 into the header-area, in the first position. So, under "Header," click the "Add Code" link:
Insert Code
In the window that has now opened, copy the code snippet from CCM19 (-) into the field labeled “Enter the code snippet here” (-). It will look like this:
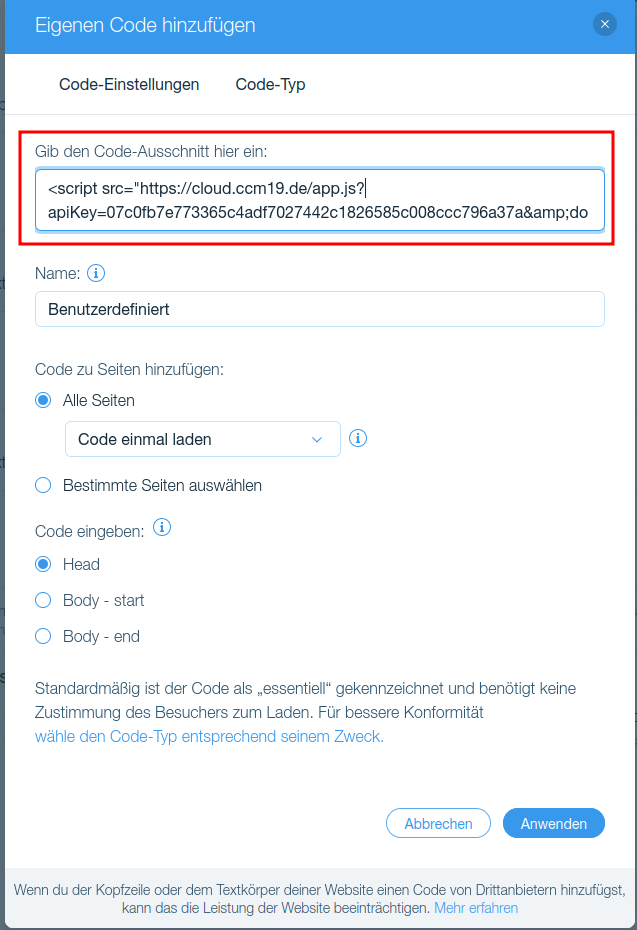
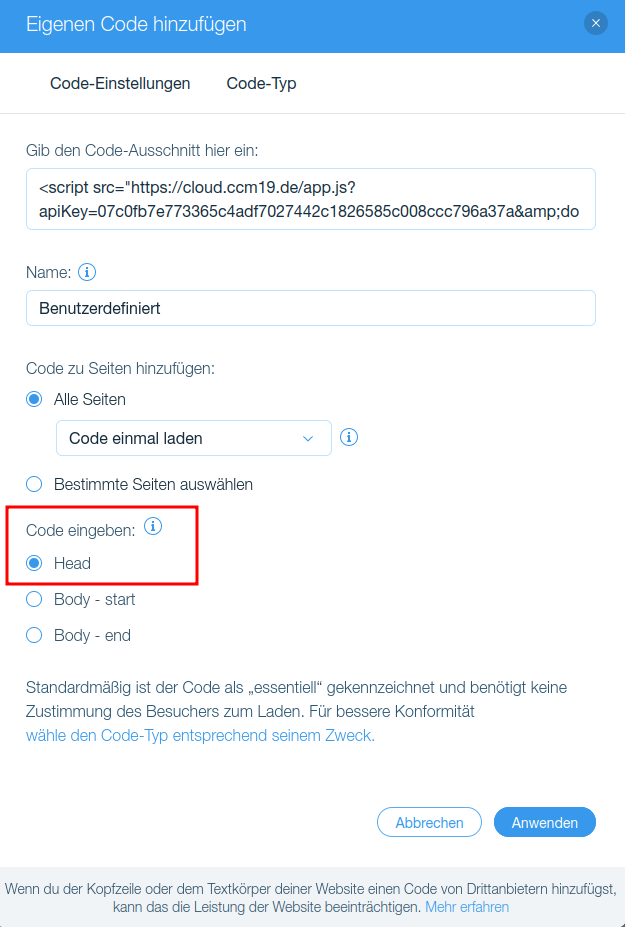
Place the Code in the Page's Head Section
Further down, under the subheading "Enter Code," "Head" is already selected. Keep this setting as is.
Done
Finally, click “Apply.” The result will look like this:
The code is now embedded on your page, and the CCM19 banner should already be visible when you visit the page.
Icon-Alternative - Cookie-Open Settings via Link
If you’d like to use a link instead of the icon (located by default in the bottom-left corner) to allow users to manage their consent from any page, follow these steps:
1. Create the text that will be linked
To ensure it’s accessible from anywhere, we recommend placing the link in the page’s footer. To do this, use a text element (text section) and enter the desired link-text (e.g., “Open Settings”). Then publish the change so that the link is visible on the front end of the live-site. Alternatively, you can also perform the next step in the preview.
2. Retrieve the-ID from the page
Now go to your website, right-click on the previously selected text (1), and then click “Inspect” (the label may vary depending on the browser you’re using). This will open the developer-console, where a portion of the code is highlighted in color (2). From this area, you must now work your way up line by line until you encounter the first div id="xxxxxxxxx" ... (3). Here, you can extract the corresponding ID.
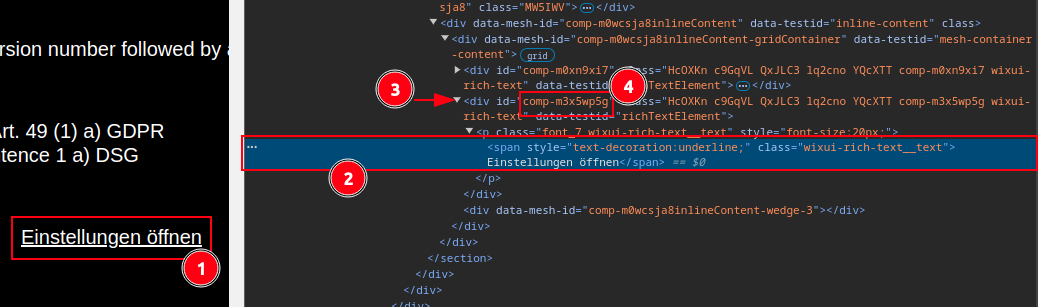
In our case, it is "comp-m3x5wp5g" (4); yours will have a different name. We’ll need this ID shortly, so you should save it somewhere or write it down.
3. Create Custom Code
Go to “Settings” and “Custom Code” to add a new code snippet.
```javascript```
Copy this code and paste it into the first field
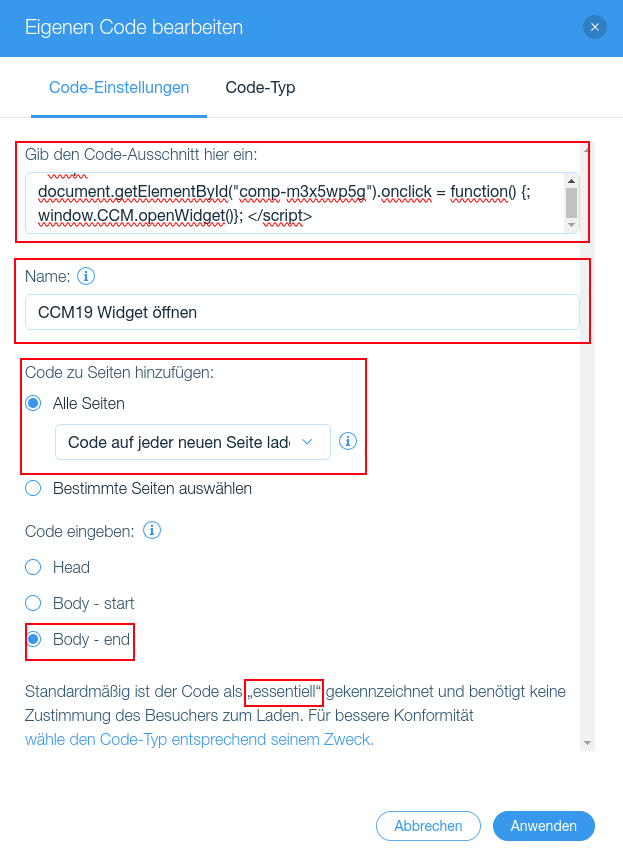
Make sure the settings match those in the screenshot (you can choose any name you like).
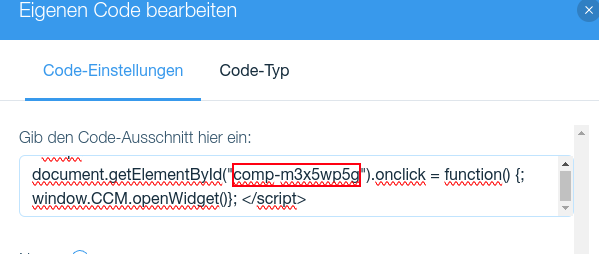
IMPORTANT: In the code snippet-, you must replace the ID (in our case, "comp-m3x5wp5g") with the one we determined earlier:
Click “Apply” to save -. From now on, the link will open the cookie settings-in the frontend.
Integrating the CCM19 Cookie-Explanation-Table
With CCM19, you can display the cookies used by your site as a table in your privacy policy. Since Wix does not currently support the conventional integration-options, you must proceed as follows to integrate the feature:
1. Create Custom Code
As described above for the CCM19 integration, we must also create custom code here.
``````
Copy the code and paste it into the first field:
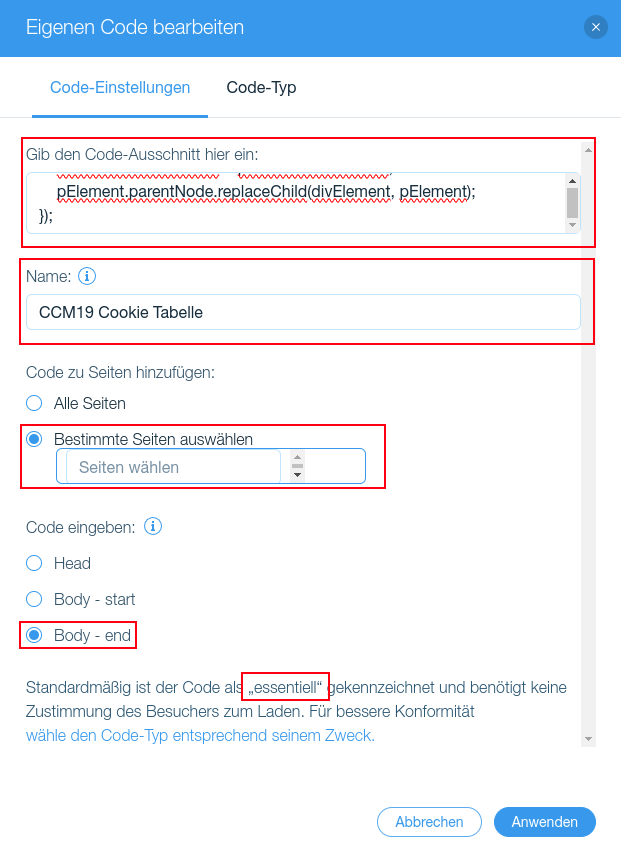
Enter a name and select the page where you want the cookie table to appear. Also, make sure that "Body - end" and the "Essential" type are selected. The latter can be set via the "Code-Type" tab (shown at the top of the image). Then click "Apply."
2. Place the table
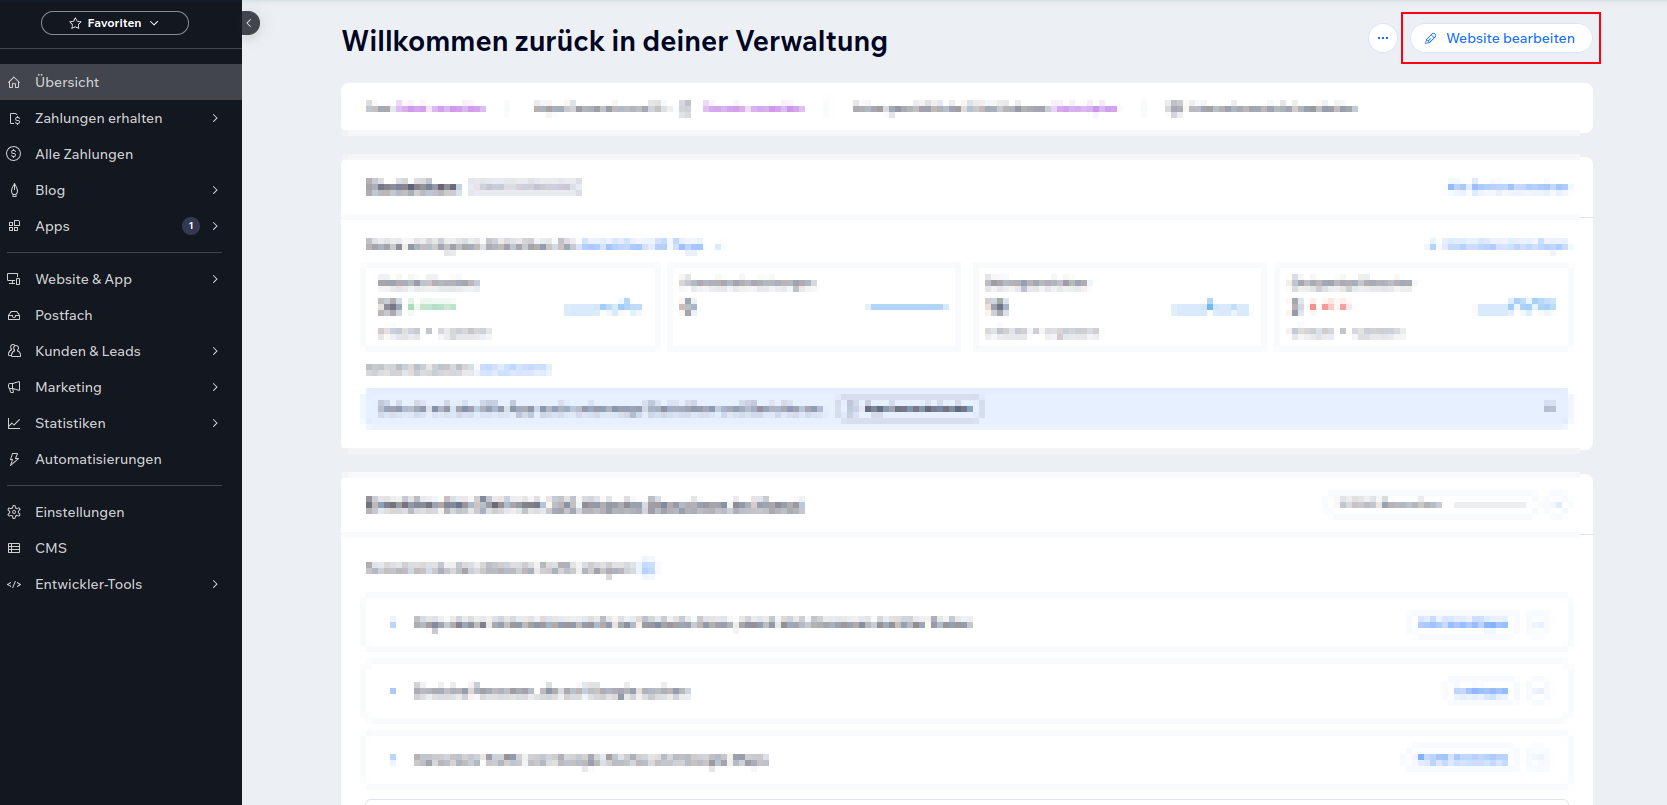
Click “Overview” in the left-hand menu to access the website-editing page via the button in the upper right corner
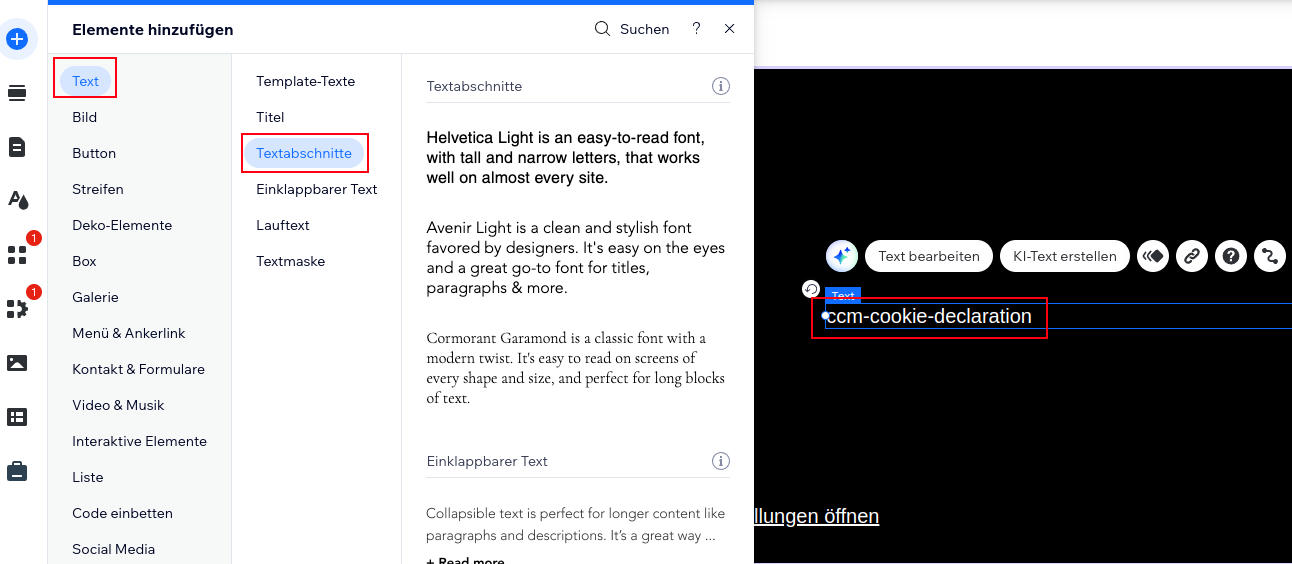
Now go to the page where the cookie-explanation-table should appear. Here, add a "Text" element as a "Text Section" and enter "ccm-cookie-declaration" in the text field, making sure there are no spaces before or after it.
That was the last step; the cookie declaration table will now be displayed on your website.