Installing the Download-Version
This section applies to you only if you have downloaded the Download-version and would like to install it. However, most customers use our cloud version.
Download the Installation File
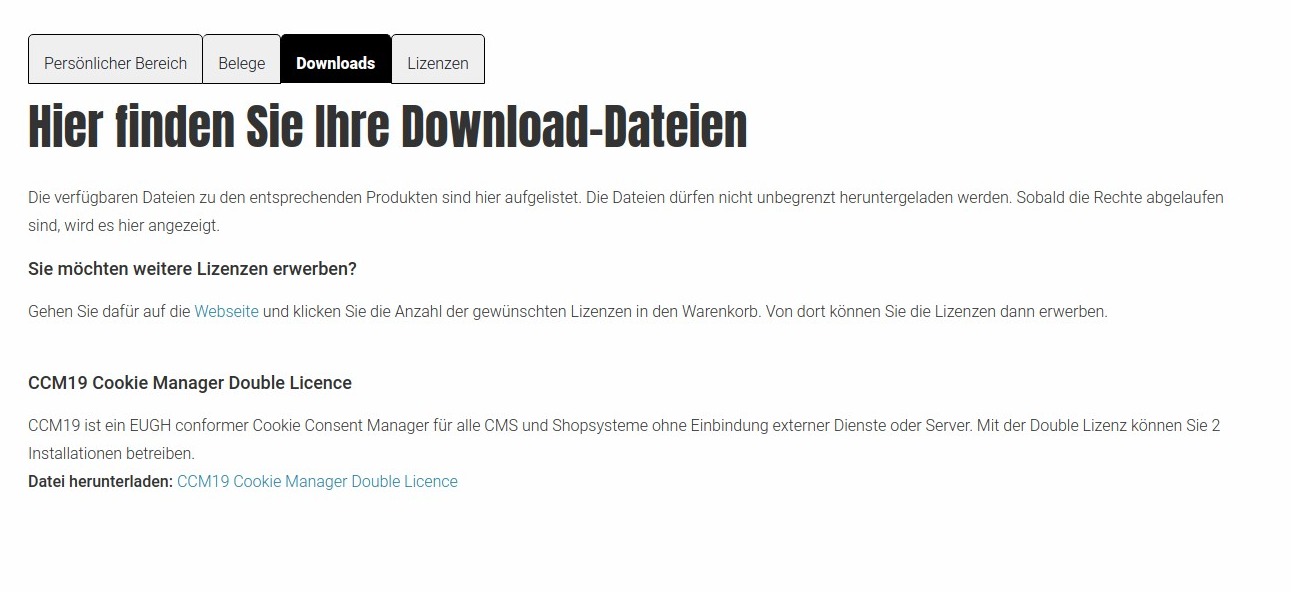
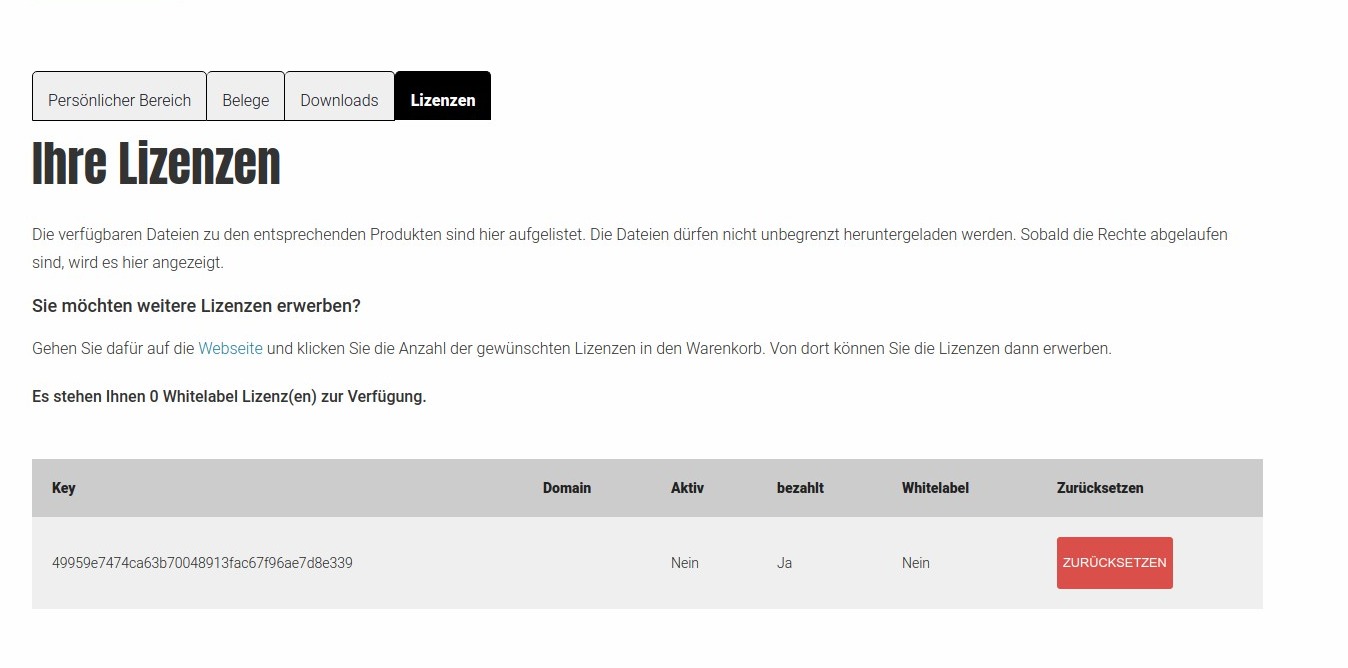
You can find the installation file in the download-section of CCM19.de. After purchasing the version, you will receive an e-mail explaining exactly where to find the files. The screen looks like this. Under the Licenses tab, you’ll find the license-key that you’ll need in Step 2 of the installation. The keys can also be reset.
Unzip and Upload Files
When you download the files, you’ll receive a .zip file that you’ll need to unzip on your PC. Two new files will now be saved on your computer: setup.php and ccm19.zip.
Upload files to your server via FTP
After extracting the files, you must upload both files to your server via FTP, SSH, or another method. We recommend following your hosting provider’s instructions. If your hosting provider has not provided any information about your server, please contact them to request it.
We cannot answer any questions regarding your FTP-or login-credentials; we do NOT have this information.
Now upload the setup.php and ccm19.zip files to the root-directory of your website (or to any folder you create).
By default, CCM19 creates a subfolder named /ccm19. So place your files as you see fit. If you want to install CCM19 in the current directory instead of a subfolder, please enter ./ in the directory field.
Note on PHP Version
The PHP version used must be at leastPHP 8.2.x . Higher PHP-versions are also supported. \ If you cannot easily update the PHP-version on your site, an alternative is to set up a (sub-)domain with your provider and set the PHP version there to 7.2 or higher.
You can then install the CCM19 script on this (sub-)domain and integrate it into your actual website from there.
If that doesn’t work either, or if the effort involved is too great for you, you can use the Service Option of our tool—no installation is required here.
Installation of - Step 1
Now navigate to the folder on your website where you saved the files and open the setup.php file. In our example, this would be https://www.MeineDomain.de/setup.php, since we saved the files directly in the root directory.
Rename the Directory
Ideally, you should rename the directory to something innocuous. A random combination of letters and numbers works best to bypass blockers that might otherwise block the script.
Oops— - —is a 500 error or another error occurring?
If you’re using 1&1 or domainfactory, make sure to set the RewriteBase after installation. Here’s a brief explanation:
In the following, we’ll assume that you’ve placed the CCM19 installation in the “cookies” directory. If you install CCM19 in a different directory, you’ll need to adjust the example accordingly. Basically, two .htaccess files need to be modified.
- Go to meinedomain.de/cookies/setup.php and follow the instructions.
- setup.php should redirect you to mydomain.de/cookies/ccm19/public/setup – This is where the 500 "-" error occurs.
- Edit
mydomain.de/cookies/ccm19/.htaccess– add the following below the line "RewriteEngine On":RewriteBase /cookies/ccm19/ - Edit meinedomain.de/cookies/ccm19/public/.htaccess – here, too, add the following below "RewriteEngine On":
RewriteBase /cookies/ccm19/public/
Now try accessing mydomain.de/cookies/ccm19/public/setup.
If the 500 "-" error persists, there may be a different issue. We would be happy to investigate the issue for you free of charge; all we need is temporary FTP-access, which you can close again once the work is complete. Simply contact us via our support form.
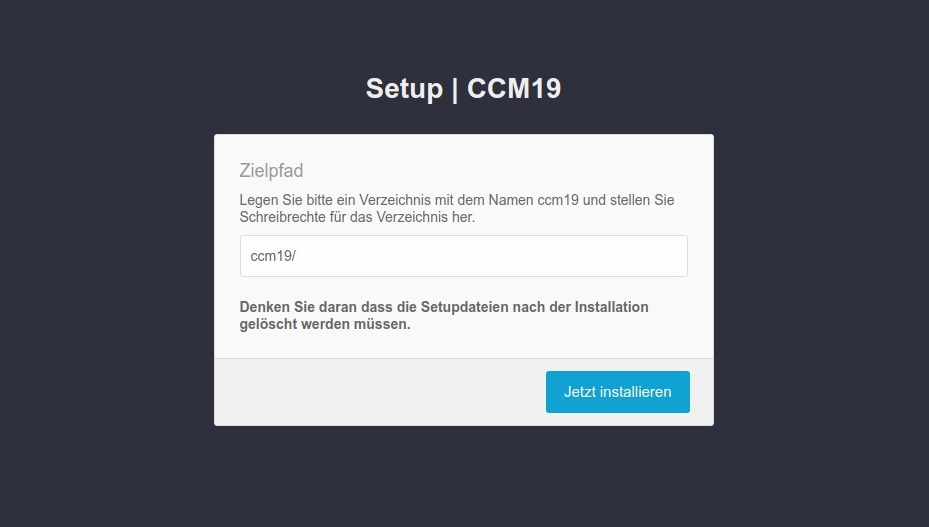
The CCM19-tool will be accessible later in this example via https://www.MeineDomain.de/ccm19/ .
On this screen, you can change the installation directory. Here, you can also specify folders such as /cookies/, /kekse/, or similar, as well as ./ for the current directory. For our example, we’ll leave it as /ccm19/.
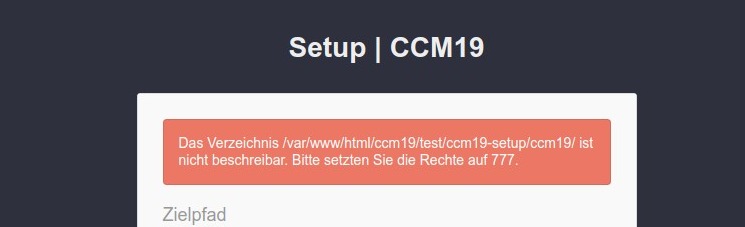
Write Permissions
Please make sure you set the write permissions for the directory correctly so that the setup script can write files to it; otherwise, the following error message will appear.
nginx? - Adjusting Server Configuration
If you are using nginx as your web server, adjustments to the server configuration are usually necessary. You can find more information on this in the Technical Section.
Step 2: Enter the -, License, and-Key
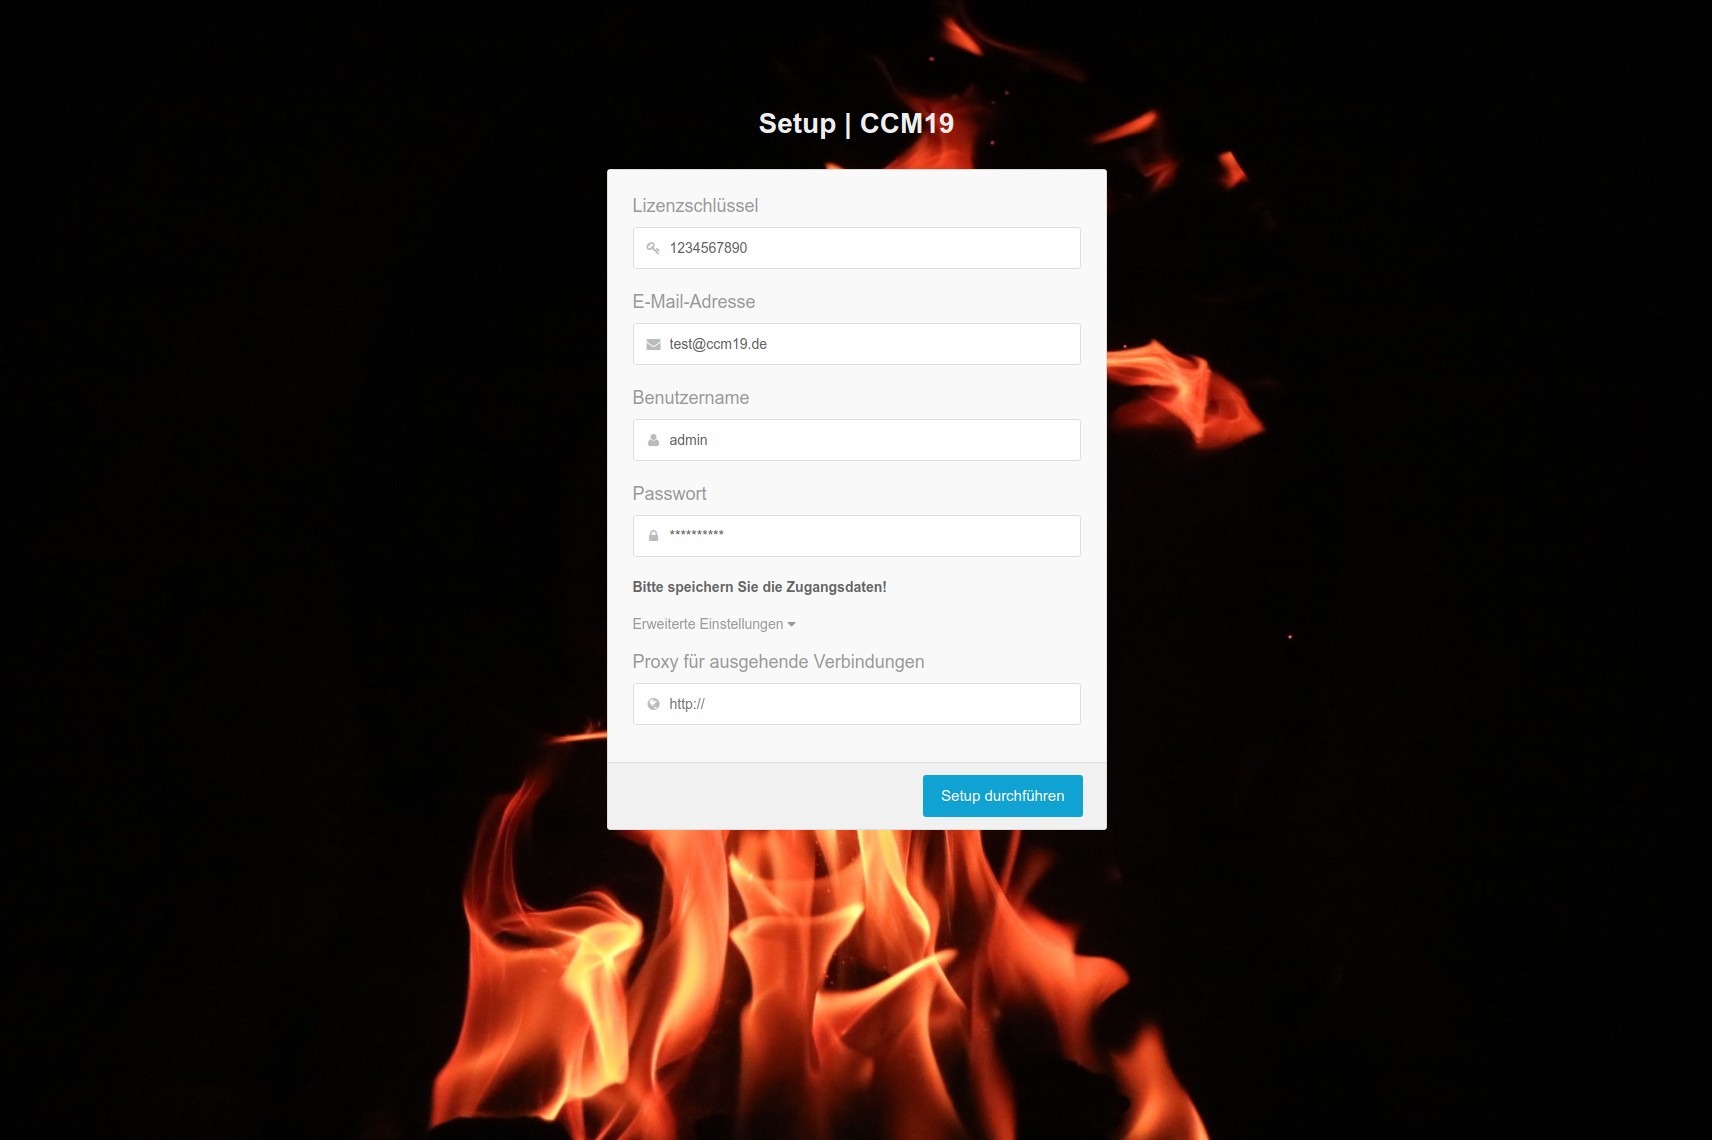
After the quick installation, you’ll be redirected to the registration screen. Here, you’ll need to enter the license key you purchased, which you can view here.
Alternatively, on the ccm19.de website, navigate to the top--menu, select Login >Download Version Login and then, in the Sub-Menu , go to Licenses . There, copy your license key and paste it into the corresponding column.
Next, enter a valid e--mail address (without a valid e--mail address, you won’t be able to reset your password later!). Now you need to set a username and password. The username CANNOT be changed later! Then click “Run Setup” and the system will be installed.
Additionally, under “Advanced Settings,” you can specify a proxy server if your company uses one to serve the website—however, this is very rare; it is not usually done.
Done
As soon as the installation script is complete, you will be redirected to the login screen or logged in automatically.
After Installation
After installation, you should delete the setup files to prevent the setup from being run again—you’ll also see a corresponding notice in the administration panel.

Reset Key
You can use the "Reset" button to revoke the key from the installation and set a new one at any time. This is useful, for example, if you first test the installation on a subdomain and then reinstall it later on the live-system.