Shopify
Shopify is a website builder that’s growing in popularity, allowing you to set up your online store quickly and easily. Integrating our code snippet-into Shopify is just as easy as creating the store itself.
Integrating CCM19 into Shopify
1. Retrieve the code snippet-from the dashboard
Go to the dashboard for your domain in CCM19. There you’ll find the code snippet-to integrate CCM19 into your pages. Copy the code to your clipboard so you can paste it into Shopify in the next step.
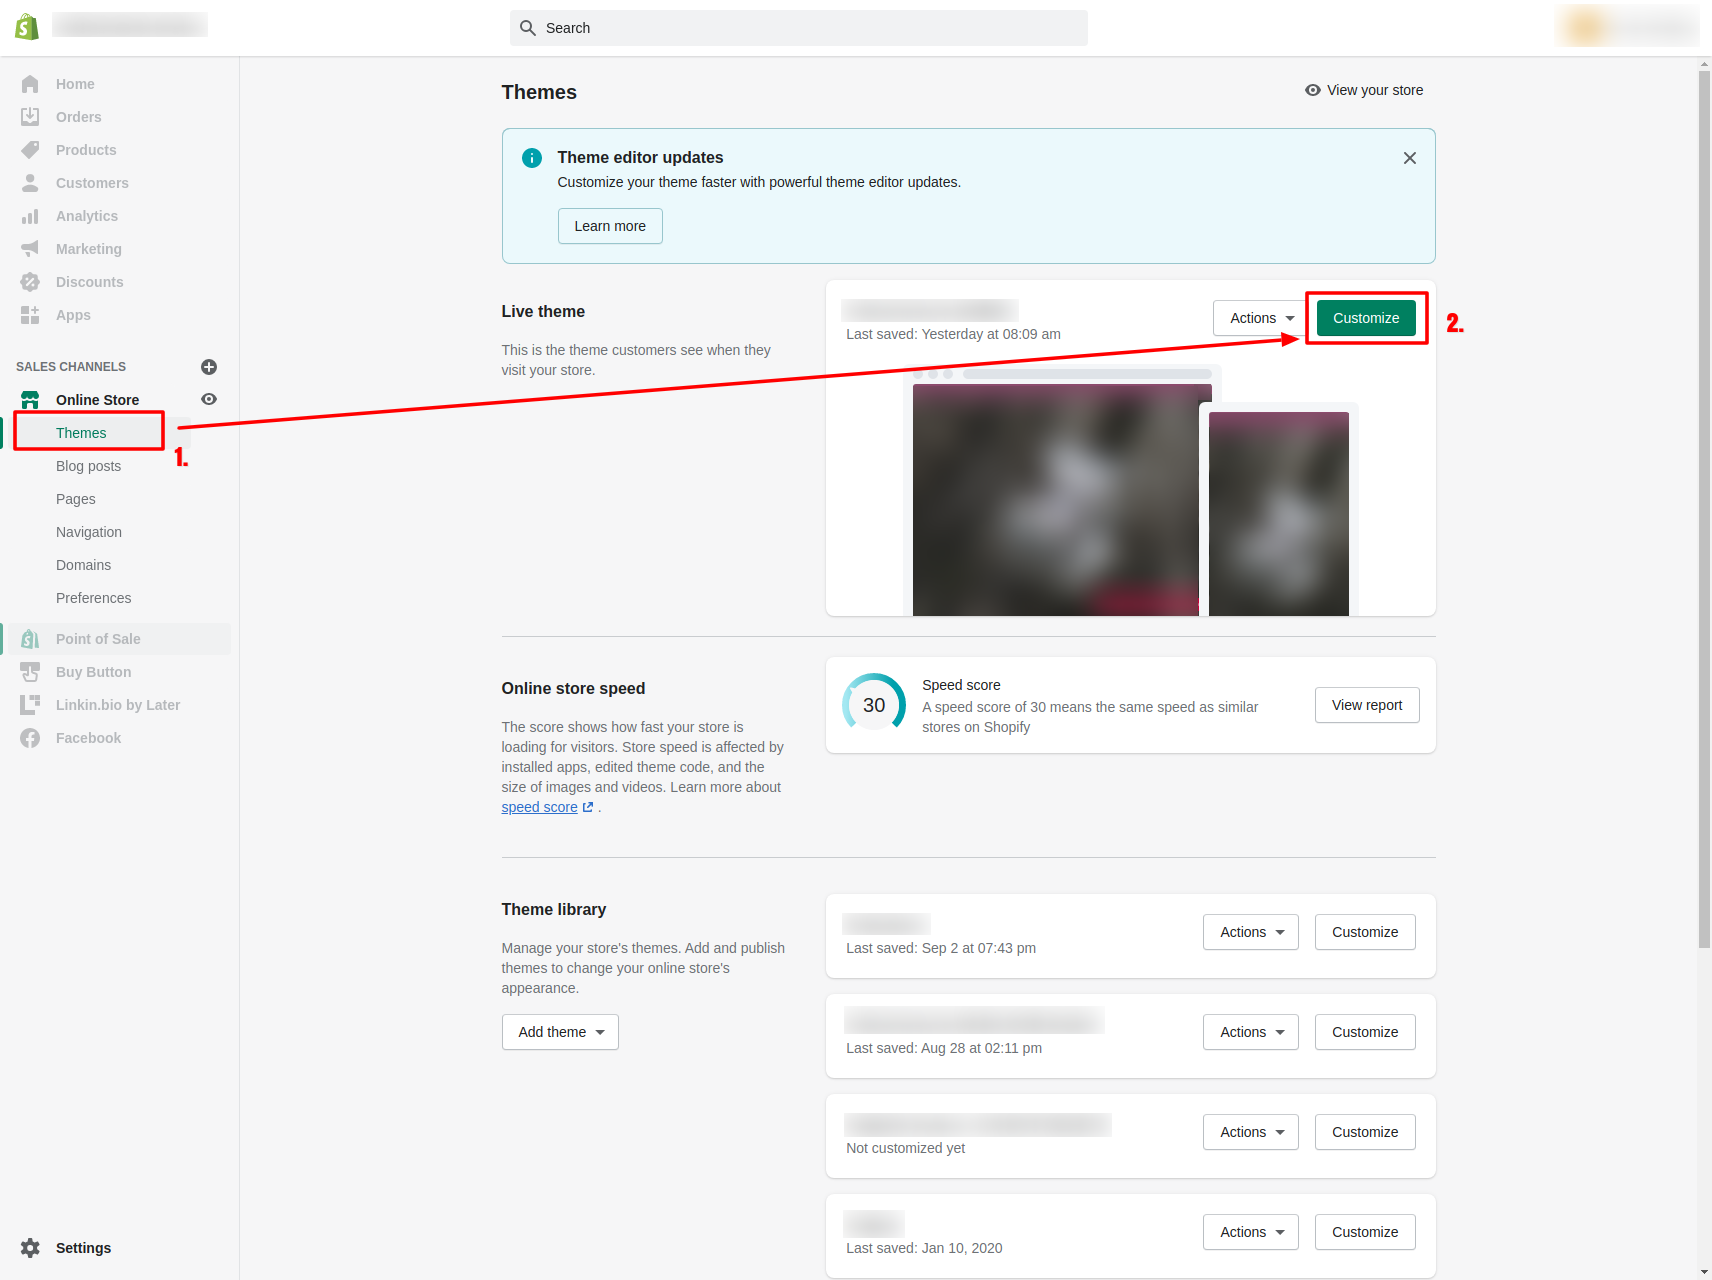
2. Shopify-Backend
Log in to your store’s backend. Navigate to Theme-Settings ① and edit your current theme ②.
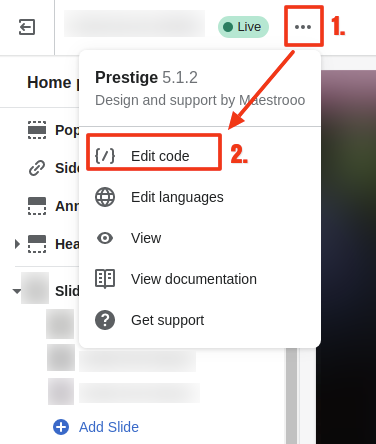
Next, open the settings using the three dots in the upper-left corner ① and click "Edit code" ②.
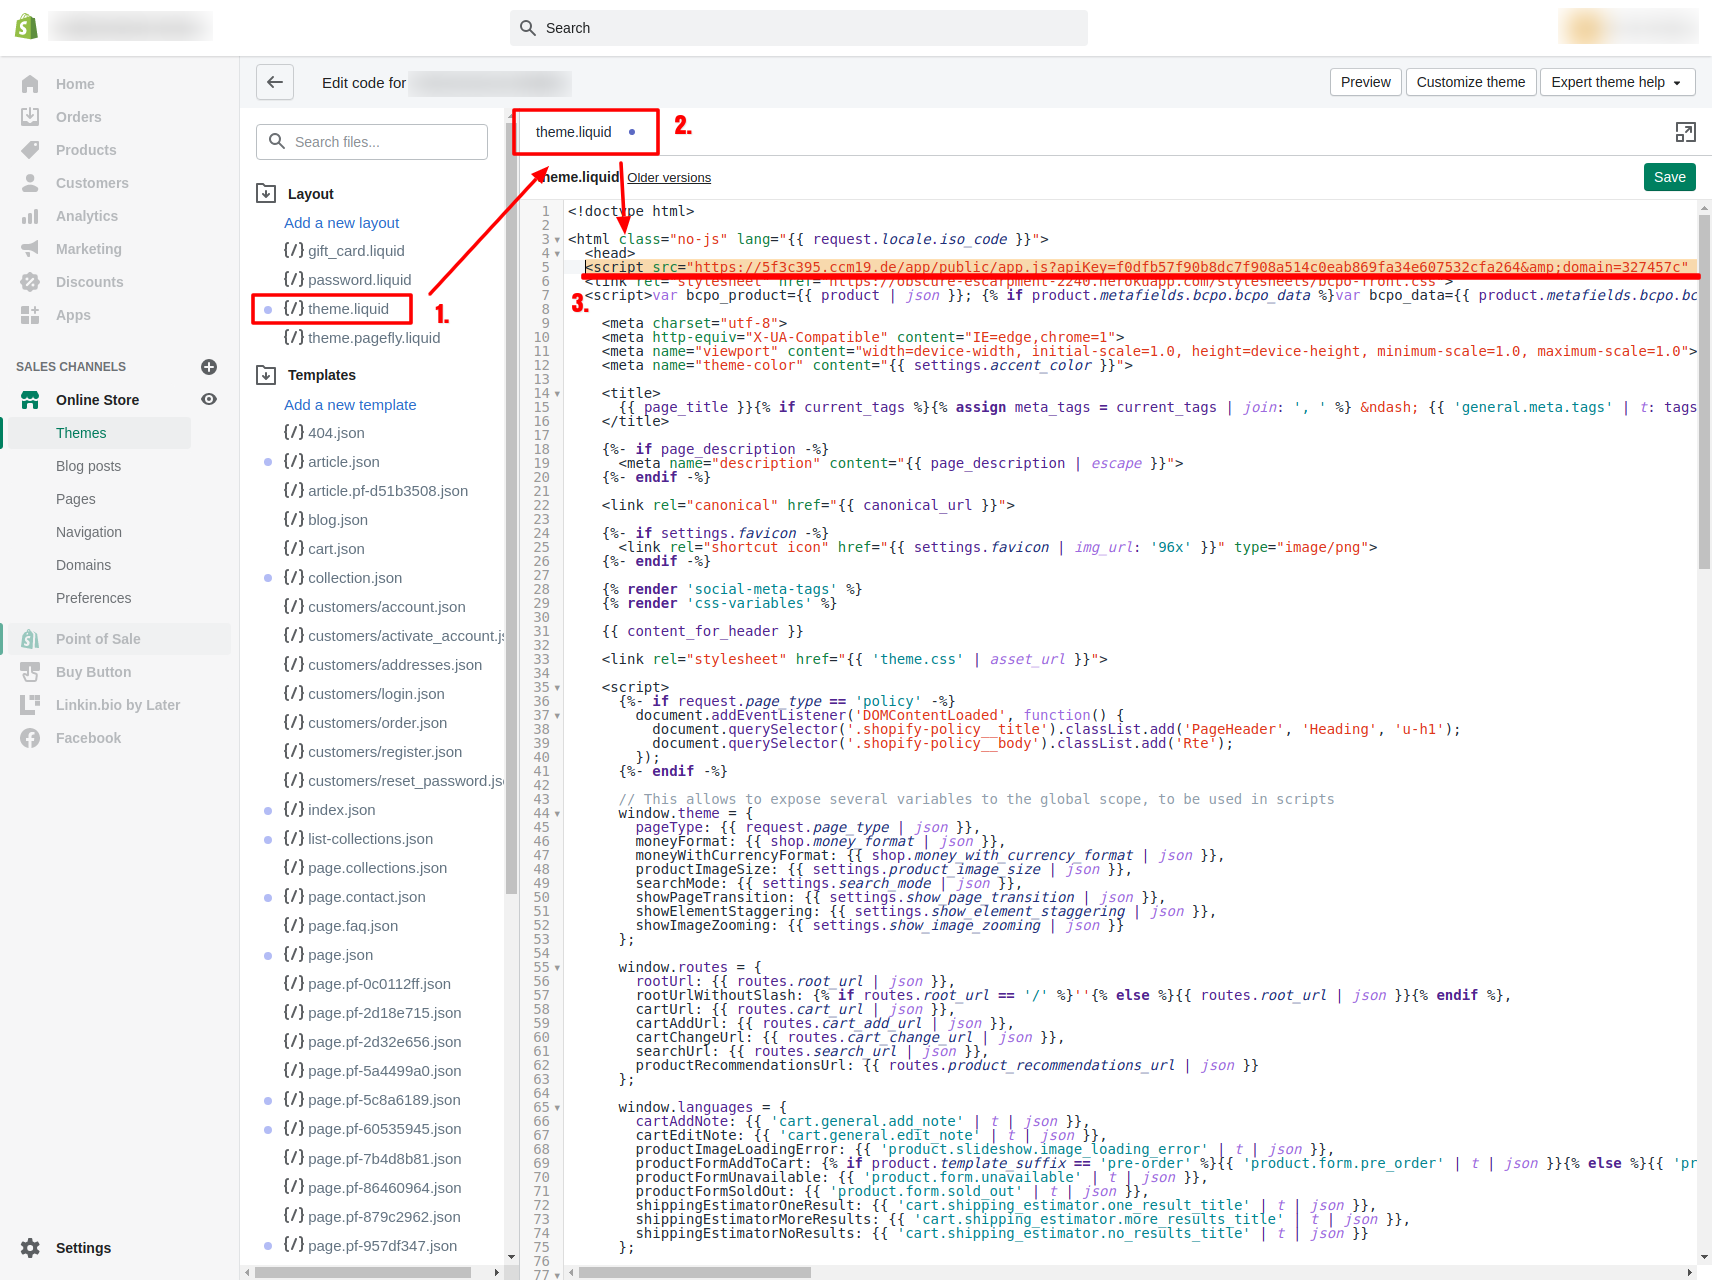
Here you’ll see the files that make up your store. Under “Layout,” you’ll find the theme.liquid file, which you now need to edit ① & ②. Insert the code snippet-from CCM19—which you copied in the first step—after the element, as shown here in the image ③.
3. Testing
Test the front end of your site to see if the widget now appears. Remember to activate the widget before using it for the first time. (Menu item: Front End-Behavior)
Customer Privacy API
Shopify offers the option to signal a visitor’s consent to data collection. To this end, Shopify provides the Customer Privacy API, which can be used to communicate a website visitor’s consent—or lack thereof.
In CCM19, these signals are intended to be sent via the “Shopify Pixel” integration. Therefore, this integration must be present under “Integrations & Cookies” if consent for data collection is to be obtained. In the following example, we assume that a “Shopify Pixel” integration exists in your CCM19-configuration, which will manage consent in conjunction with this feature.
The basic use of the API is implemented in the following code-block. Insert the script below into a technically necessary integration (for example, the Shopify integration itself, which should already be present and always runs) in the “Integration Source Code” field. You can find the integrations under "Integrations & Cookies." If you use our database entry-for "Shopify," the code has already been automatically integrated.
```html```
It is important to note that the value of the embeddingName variable in line 4 must always match the name of the corresponding Shopify-integration in CCM19. If the name of your integration differs, you must replace the string Shopify Pixel with the actual name.
In addition, the Customer Privacy API currently offers a choice of four signals that can be sent once consent has been granted—analytics, marketing, preferences, and sale_of_data. The signals are documented here: https://shopify.dev/docs/api/customer-privacy#collect-and-register-consent.
By default, the code above sends the analytics and marketing signals. Review the linked Shopify-documentation to decide which signals should be sent once consent is granted. In the code above, you can enable or disable the signals to- in lines 8–11—true sends the signal, while false does not.
var trackingConsent = {
  analytics: true, // signal is sent
  marketing: true, // signal is sent
  preferences: false, // signal is omitted
  sale_of_data: false, // signal is omitted
};